FOLLOW US

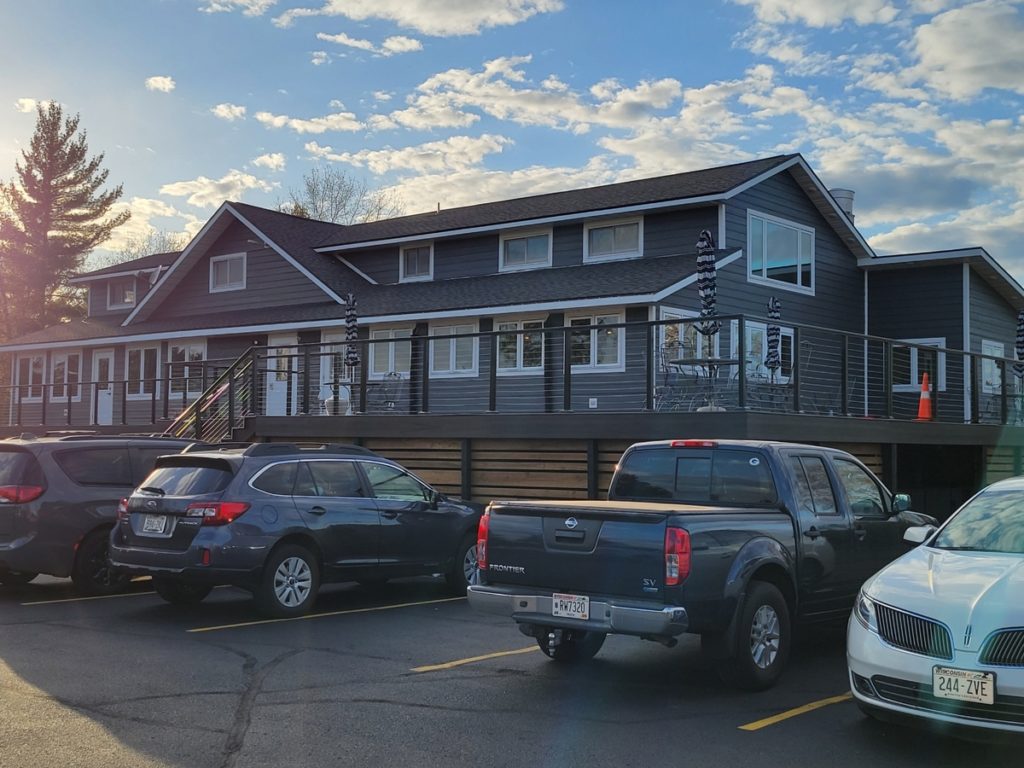
Enhancing or renovating a space always comes with challenges. New projects involve precise planning, from measuring the space to buying new materials, all while staying within budget. Even a single complication can make upgrades more complex, often leading DIYers to consider alternative options. Retrofitting a space provides an easier alternative to a complete renovation. 

The RailFX Express Mount Bracket™ system makes the process easy. It provides convenience and quality and is cost-effective for upgrading any space.  

Cable Railing Made Easy
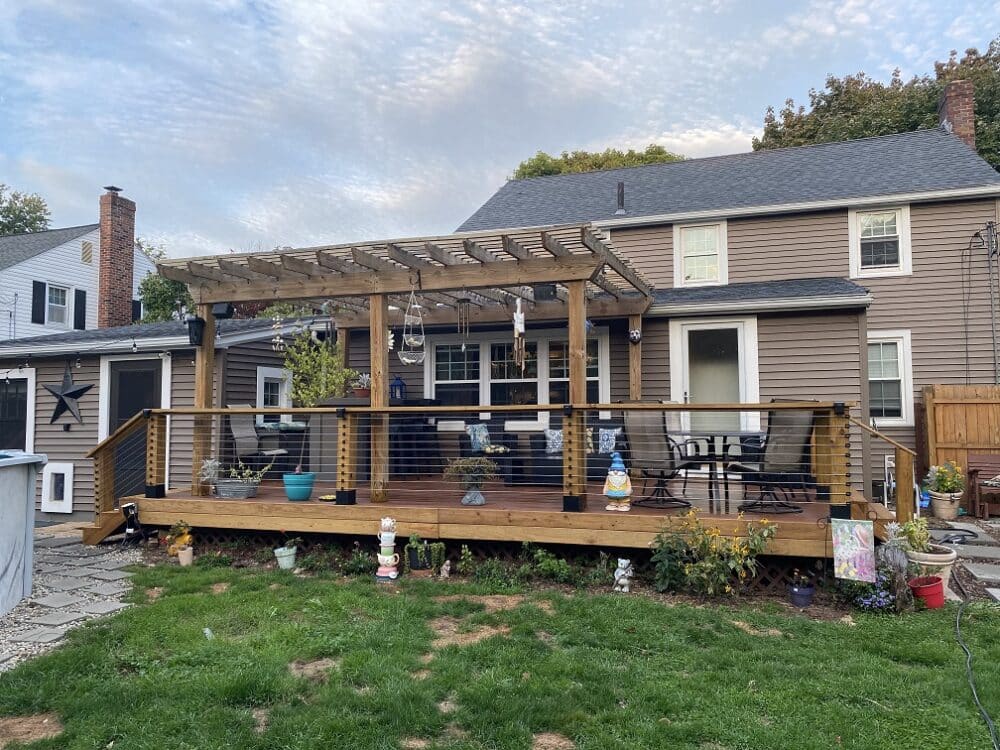
RailFX provides a range of cable railing kits and solutions designed to enhance any space while opening up the view. Unlike some systems that require extra materials and resizing, the RailFX Express Mount Bracket™ eliminates hassle. This cable railing kit ensures construction-grade quality and safety, allowing you to enjoy the upgraded view from your deck with ease. 

Before installing a new railing system on your deck, you should review a couple of items.  

Inspect Existing Posts

Express Mount Brackets mount to the outside of each deck post, delivering a unique “floating cable” appearance.

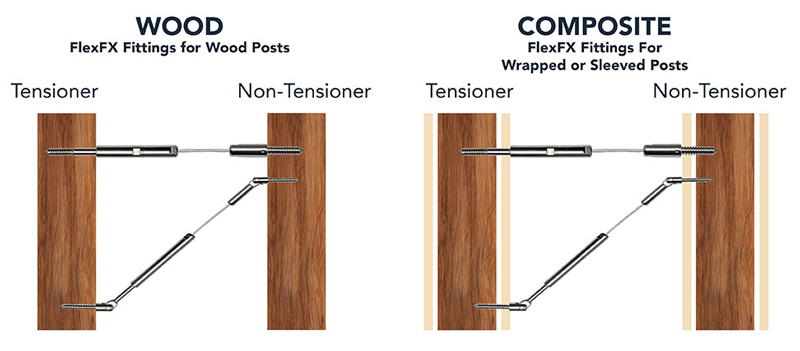
Reusing existing posts effectively saves on costs and maintains a familiar look for your deck. However, before installing the RailFX Express Mount Bracket™, inspect posts to ensure they’re in excellent condition. Any cracks or damage could lead to structural issues down the road. 

Additionally, it is essential to verify that all posts can withstand at least 200 lbs. of tension from the cable. Building code requires that amount of tension and must be maintained year-round. If any posts cannot meet these standards, it is highly recommended that they be blocked or replaced before installing any cable railing system. 

RailFX® Project Planning Tool

After inspecting your deck and confirming it’s ready for an upgrade, the RailFX team stands by to aid in planning. With the RailFX Express Mount Bracket® Project Planning Tool, you can remove guesswork when purchasing materials. You’ll receive a customized purchase list of everything needed to complete your project by answering four simple questions about your layout and railing height. 

Now, with a detailed plan and fully functional posts, it’s time to begin installing the RailFX Express Mount Bracket™. After just one afternoon, you’ll experience a completely new, safe, and fully functional outdoor oasis! 

Expanded Views in an Afternoon with RailFX®

The RailFX Express Mount Bracket™ system is easy for DIYers. You can finish the whole project in one afternoon with just a little planning. Once you’re equipped with the tools and materials to bring this cable railing system to reality on your deck, you can start a hassle-free project. 

Attaching the Universal Drilling Template

The installation begins by measuring the height of the deck’s railing and adjusting the universal drilling template to match, if necessary. 

Next, clamp the template to each end post about ½ inches back from the center of the post. The offset will help keep the hardware hidden and maintain a clean look. It’s important to note that when using the clamp, position it so it angles toward the inside of the deck to ensure safety and simplicity.  
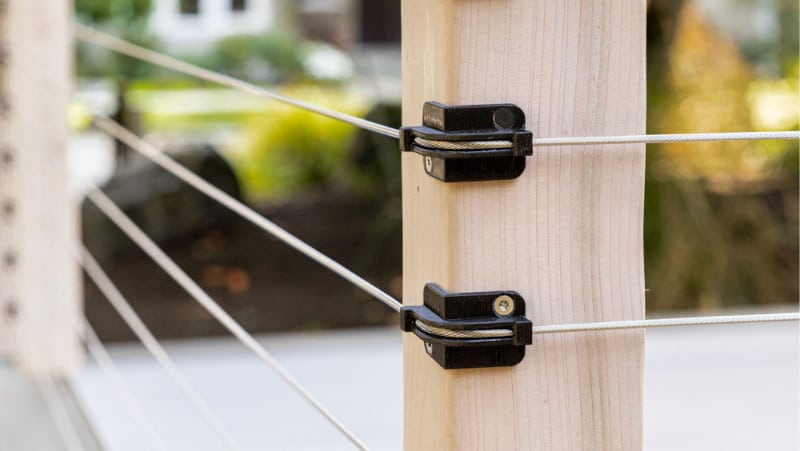
Installing Brackets

When installing, the bracket center must align precisely with the post center. To do so, measure over 1-¾ inches from one side. Once everything is aligned, begin screwing in each bracket one screw at a time, allowing minor adjustments before final tightening. 
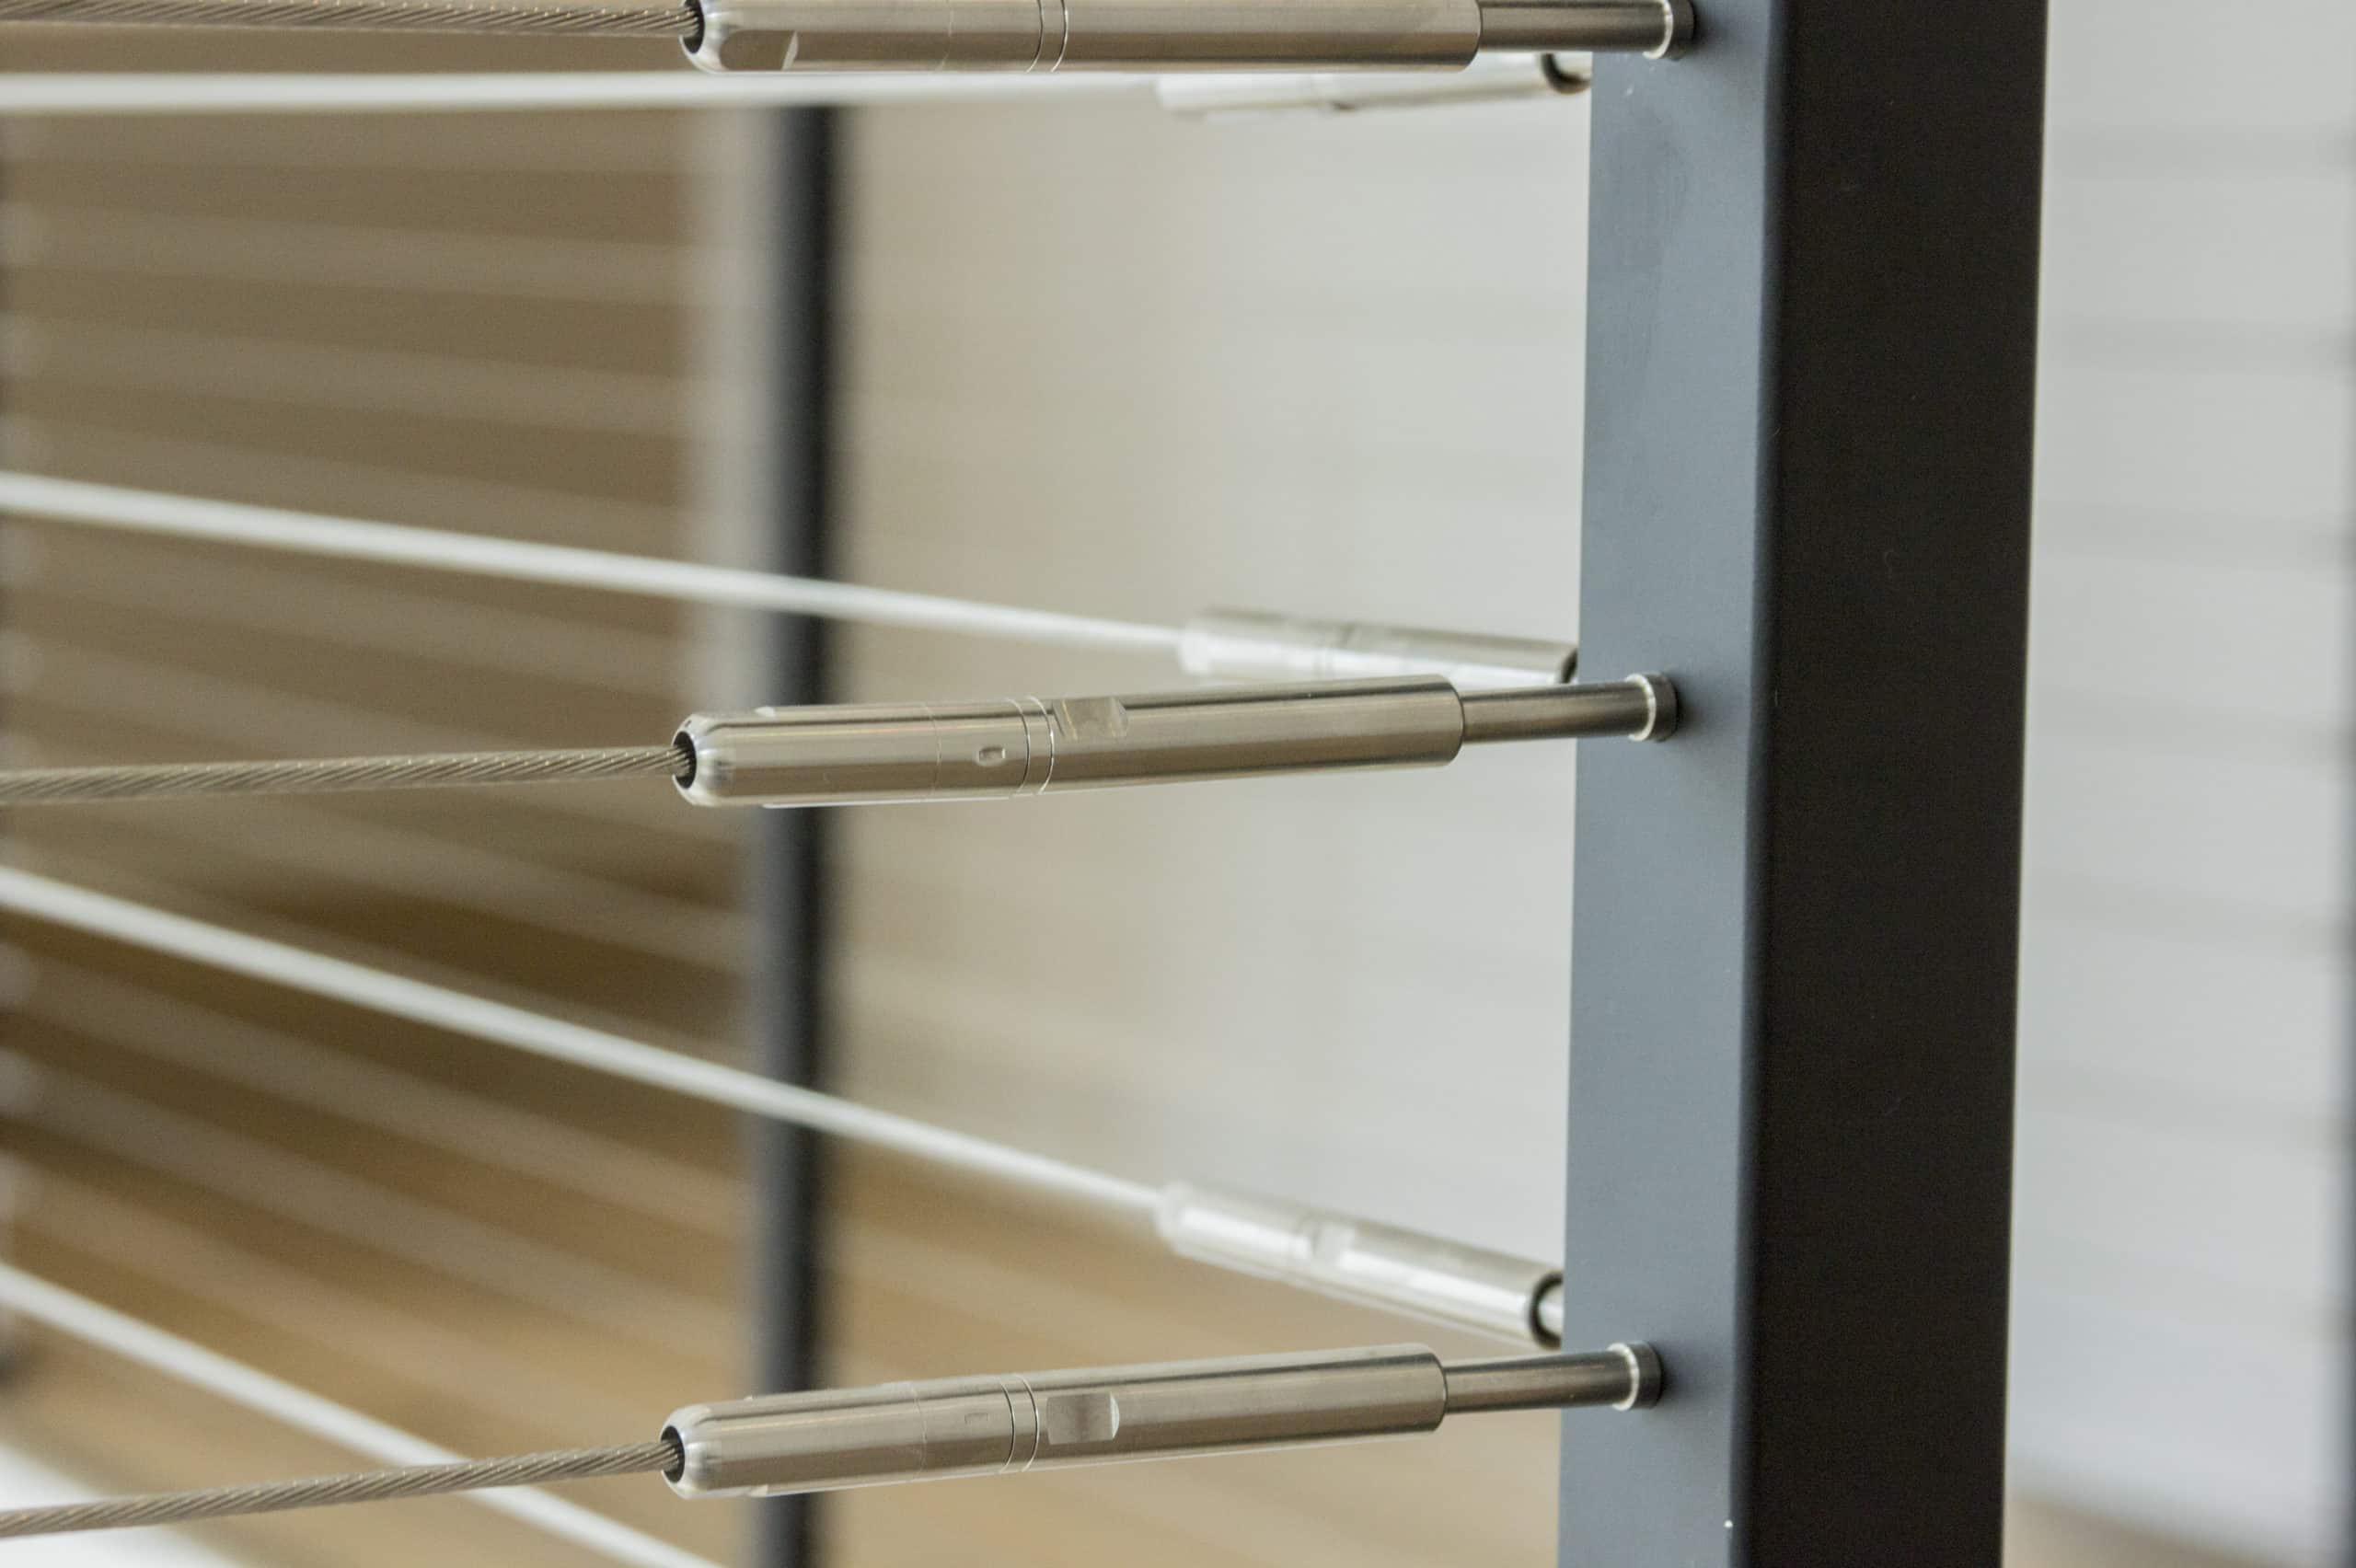
Threading the Cable

The cable is threaded through the end and corner posts to finish the installation, and the tensioning process begins. Start at the center of the run and work outward in alternating up-and-down steps to ensure even tension across all cables. RailFX provides an abrasive grinder wheel for cutting cable ends for a precise and even cut.  

Staircase Application

Brackets must be rotated so cable can pass through at an angle on stair applications. Measure the stair angle and use it to align the brackets accurately. 

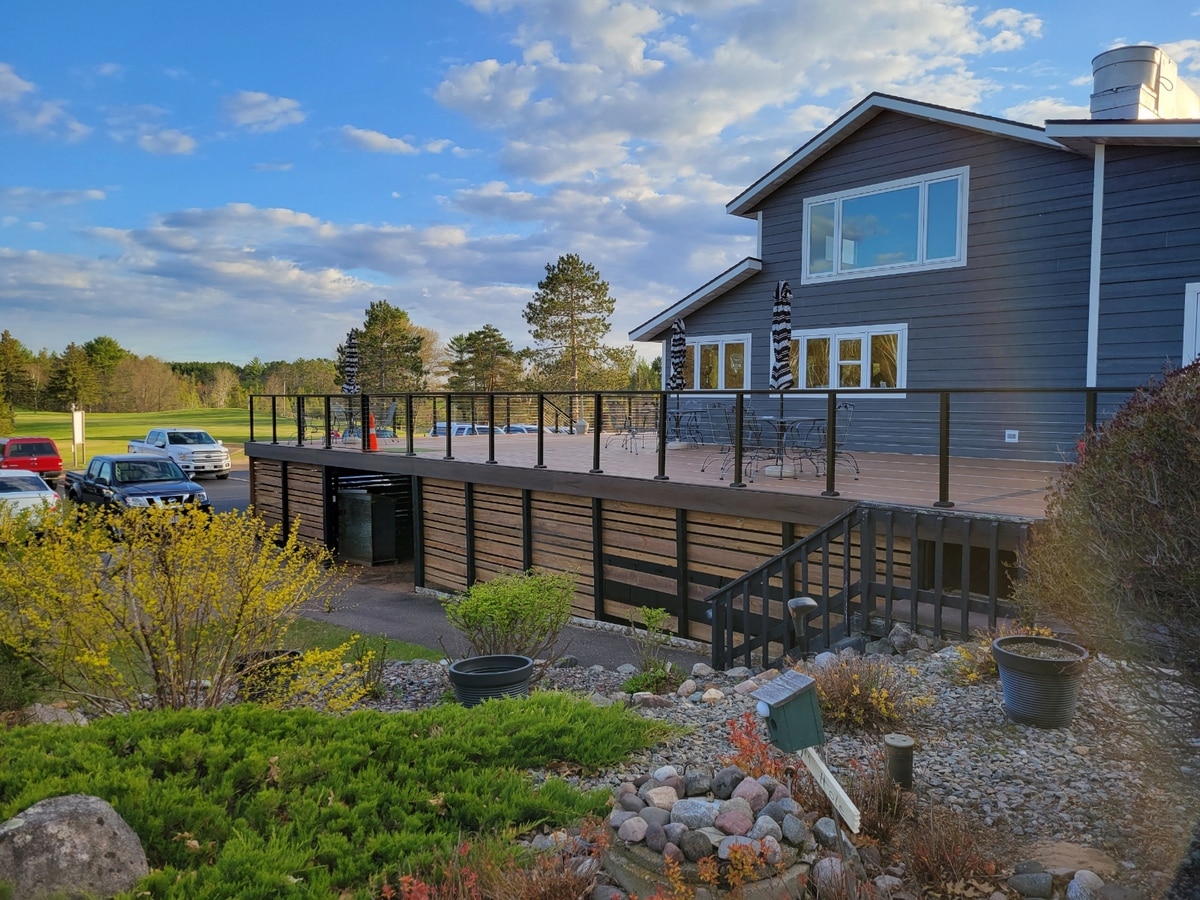
The final product is a polished, robust railing that enhances the deck’s appearance and safety. It delivers a high-quality cable railing solution designed for long-lasting performance and style. 

Where To Buy RailFX Express Mount Bracket

Retrofitting an existing railing with RailFX® is a straightforward, efficient, and stylish upgrade for any deck. You can quickly transform your outdoor space by following this step-by-step guide. Using the RailFX Express Mount Bracket™ and our Project Planning Tool and reusing existing posts to save time and cost while creating a safe, open view. In just one afternoon, you’ll have a refreshed, open deck view framed by a sleek, long-lasting railing that enhances your space’s safety and style. 

Click here to find your nearest RailFX® dealer and enhance your views today! 

Today’s homeowners want to keep their spaces beautiful and maintenance-free, using durable and design-friendly materials. RailFX® engineers’ number one goal when designing products is how quick and easy it is to install. Our FlexFX cable railing solution is ideal for a quick-turn product that makes your vision a reality for outdoor living and interior functional spaces.

Cable railing checks all the boxes – it delivers an unobstructed view and classic aesthetic while requiring minimal upkeep and a long lifespan. Cable railing is the perfect choice for professionals with the goal of exceeding client expectations.

FlexFX Installation Simplified

Often, homeowner design choices translate to complex and time-consuming installations for the pro. The RailFX team understands that while satisfying your client is a top priority, extra time spent on a project can impact the opportunity to take on another.

With the pro installer in mind, our engineering and product development teams went to work to create an easier-to-install line of fittings. The result: The FlexFX product line.

FlexFX is a line of surface mount fittings that couples with a spool of cable available in 100- and 500-feet— allowing you to customize and build the cable railing solution needed to complete any job— whether it’s a new build or updating an existing railing.

To determine the fitting options you’ll need for your projects, follow these simple steps.

  1. Determine the post material where the stainless-steel cable will be installed.
  2. Measure your level and stair runs to calculate the number of fittings you will need.
  3. Add up the tensioners and non-tensioners.*
  4. Calculate total cable footage — plus 5 percent.

*Railings measuring 36-inches need ten fittings on each end for level runs and nine fittings on each end for the stair. Railings measuring 42-inches need 12 fittings on each end for level runs and 11 fittings on each end for the stair.

FlexFX uses the RailFX proprietary Push-Lock® fittings featuring a locking wedge system that securely holds the cable, making for a quick and simple FlexFX installation that requires no crimping or special tools. The Push-Lock fitting works seamlessly with any post material including, wood, metal, composite sleeve posts, and single and double-corner posts.

Keep in mind that FlexFX is not just for exterior projects like decks and docks. FlexFX stainless-steel fittings are also well-suited for finishing interior balconies and stairways. The only requirement? Each cable run must have one tensioning fitting on the end.

The End Result

FlexFX is a win-win for everyone. Homeowners are thrilled with the result: a low-maintenance product that offers enhanced open views, creating a space that feels bigger. The win for the pro? With FlexFX fittings, deck professionals and other contractors can complete each cable railing job more efficiently, enabling them to save time and take on more projects. And what does more time for projects mean? More happy homeowners are enjoying their view.

Golf Course Adds Cable Railing to Maximize its Picturesque Views

In northern Wisconsin sits the city of Tomahawk — population just under 4,000 — and the Inshalla Country Club, a picturesque 18-hole public golf course. Locally owned for more than 57 years, the club has undergone upgrades throughout the year and features a driving range, putting and chipping greens, a pro shop, and banquet and dining rooms for entertaining. 

In 2017, the club was purchased, by two Tomahawk natives, Jason Kahle and his uncle, Bill Mark. “It’s always been a locally owned family business, and it was something Bill and I wanted to do,” said Jason, co-owner. Since then, they’ve made some upgrades, including gutting the restrooms in their first year as new owners and within the last year, they rebuilt the bar and pro shop areas. 

Jason was in the building industry for more than 15 years as a designer for Tomahawk Log and Country Homes and worked for a steel fabricator on the commercial side of the business. Therefore, choosing the right building products that would hold up to the wear and tear of a couple of hundred people a day was an important consideration. 

Low maintenance — sectioned and easily replaceable — and easy-to-maintain products were essential. “We looked for products that required minimum maintenance and could withstand the 95-degree heat and the 40-below climate swings,” said Jason. “In the winter, we put salt on the surfaces, so the decking material had to stand up to it.”

They took the clubhouse out of the early 1990s and into the present, replacing the heavy feel of maroon-colored walls, oak wood, and green carpeting. They used vinyl planks for the flooring replacement, which allows for easy panel replacement when needed.

They added new siding, new decking, and railing off the clubhouse this past fall and winter. They demolished the existing concrete deck and vertical 2 x 2 wood railing and replaced it with Armadillo Composite Decking and finished it with RailFX aluminum cable railings in black. A hitting mat was built into the deck for guests to use during events, and in keeping with the “seeing the view through the railings,” they built a 10-foot gate — two 5-foot gate openings — made with RailFX.  

The cable railing system by RailFX, hitting Jason’s minimum maintenance requirements, was installed in February. “RailFX was very user-friendly with easy-to-follow directions,” said Jason. 

Our customers would complain that they couldn’t see the view when they were sitting on the original deck, so we looked for something easy to install and didn’t block the view when sitting out on the deck.” ~ Jason