FOLLOW US

Golf Course Adds Cable Railing to Maximize its Picturesque Views

In northern Wisconsin sits the city of Tomahawk — population just under 4,000 — and the Inshalla Country Club, a picturesque 18-hole public golf course. Locally owned for more than 57 years, the club has undergone upgrades throughout the year and features a driving range, putting and chipping greens, a pro shop, and banquet and dining rooms for entertaining. 

In 2017, the club was purchased, by two Tomahawk natives, Jason Kahle and his uncle, Bill Mark. “It’s always been a locally owned family business, and it was something Bill and I wanted to do,” said Jason, co-owner. Since then, they’ve made some upgrades, including gutting the restrooms in their first year as new owners and within the last year, they rebuilt the bar and pro shop areas. 

Jason was in the building industry for more than 15 years as a designer for Tomahawk Log and Country Homes and worked for a steel fabricator on the commercial side of the business. Therefore, choosing the right building products that would hold up to the wear and tear of a couple of hundred people a day was an important consideration. 

Low maintenance — sectioned and easily replaceable — and easy-to-maintain products were essential. “We looked for products that required minimum maintenance and could withstand the 95-degree heat and the 40-below climate swings,” said Jason. “In the winter, we put salt on the surfaces, so the decking material had to stand up to it.”

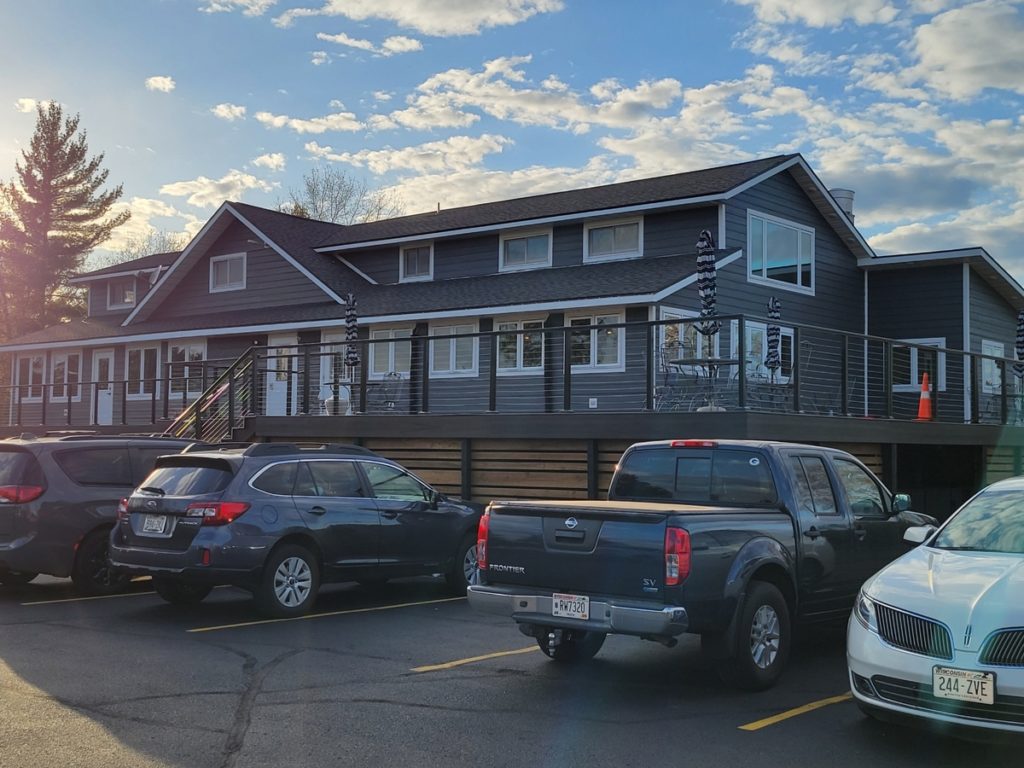
They took the clubhouse out of the early 1990s and into the present, replacing the heavy feel of maroon-colored walls, oak wood, and green carpeting. They used vinyl planks for the flooring replacement, which allows for easy panel replacement when needed.

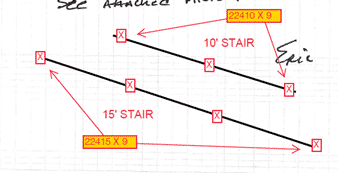
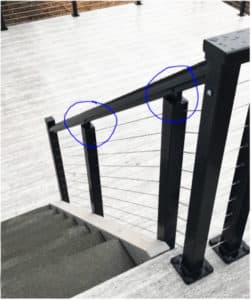
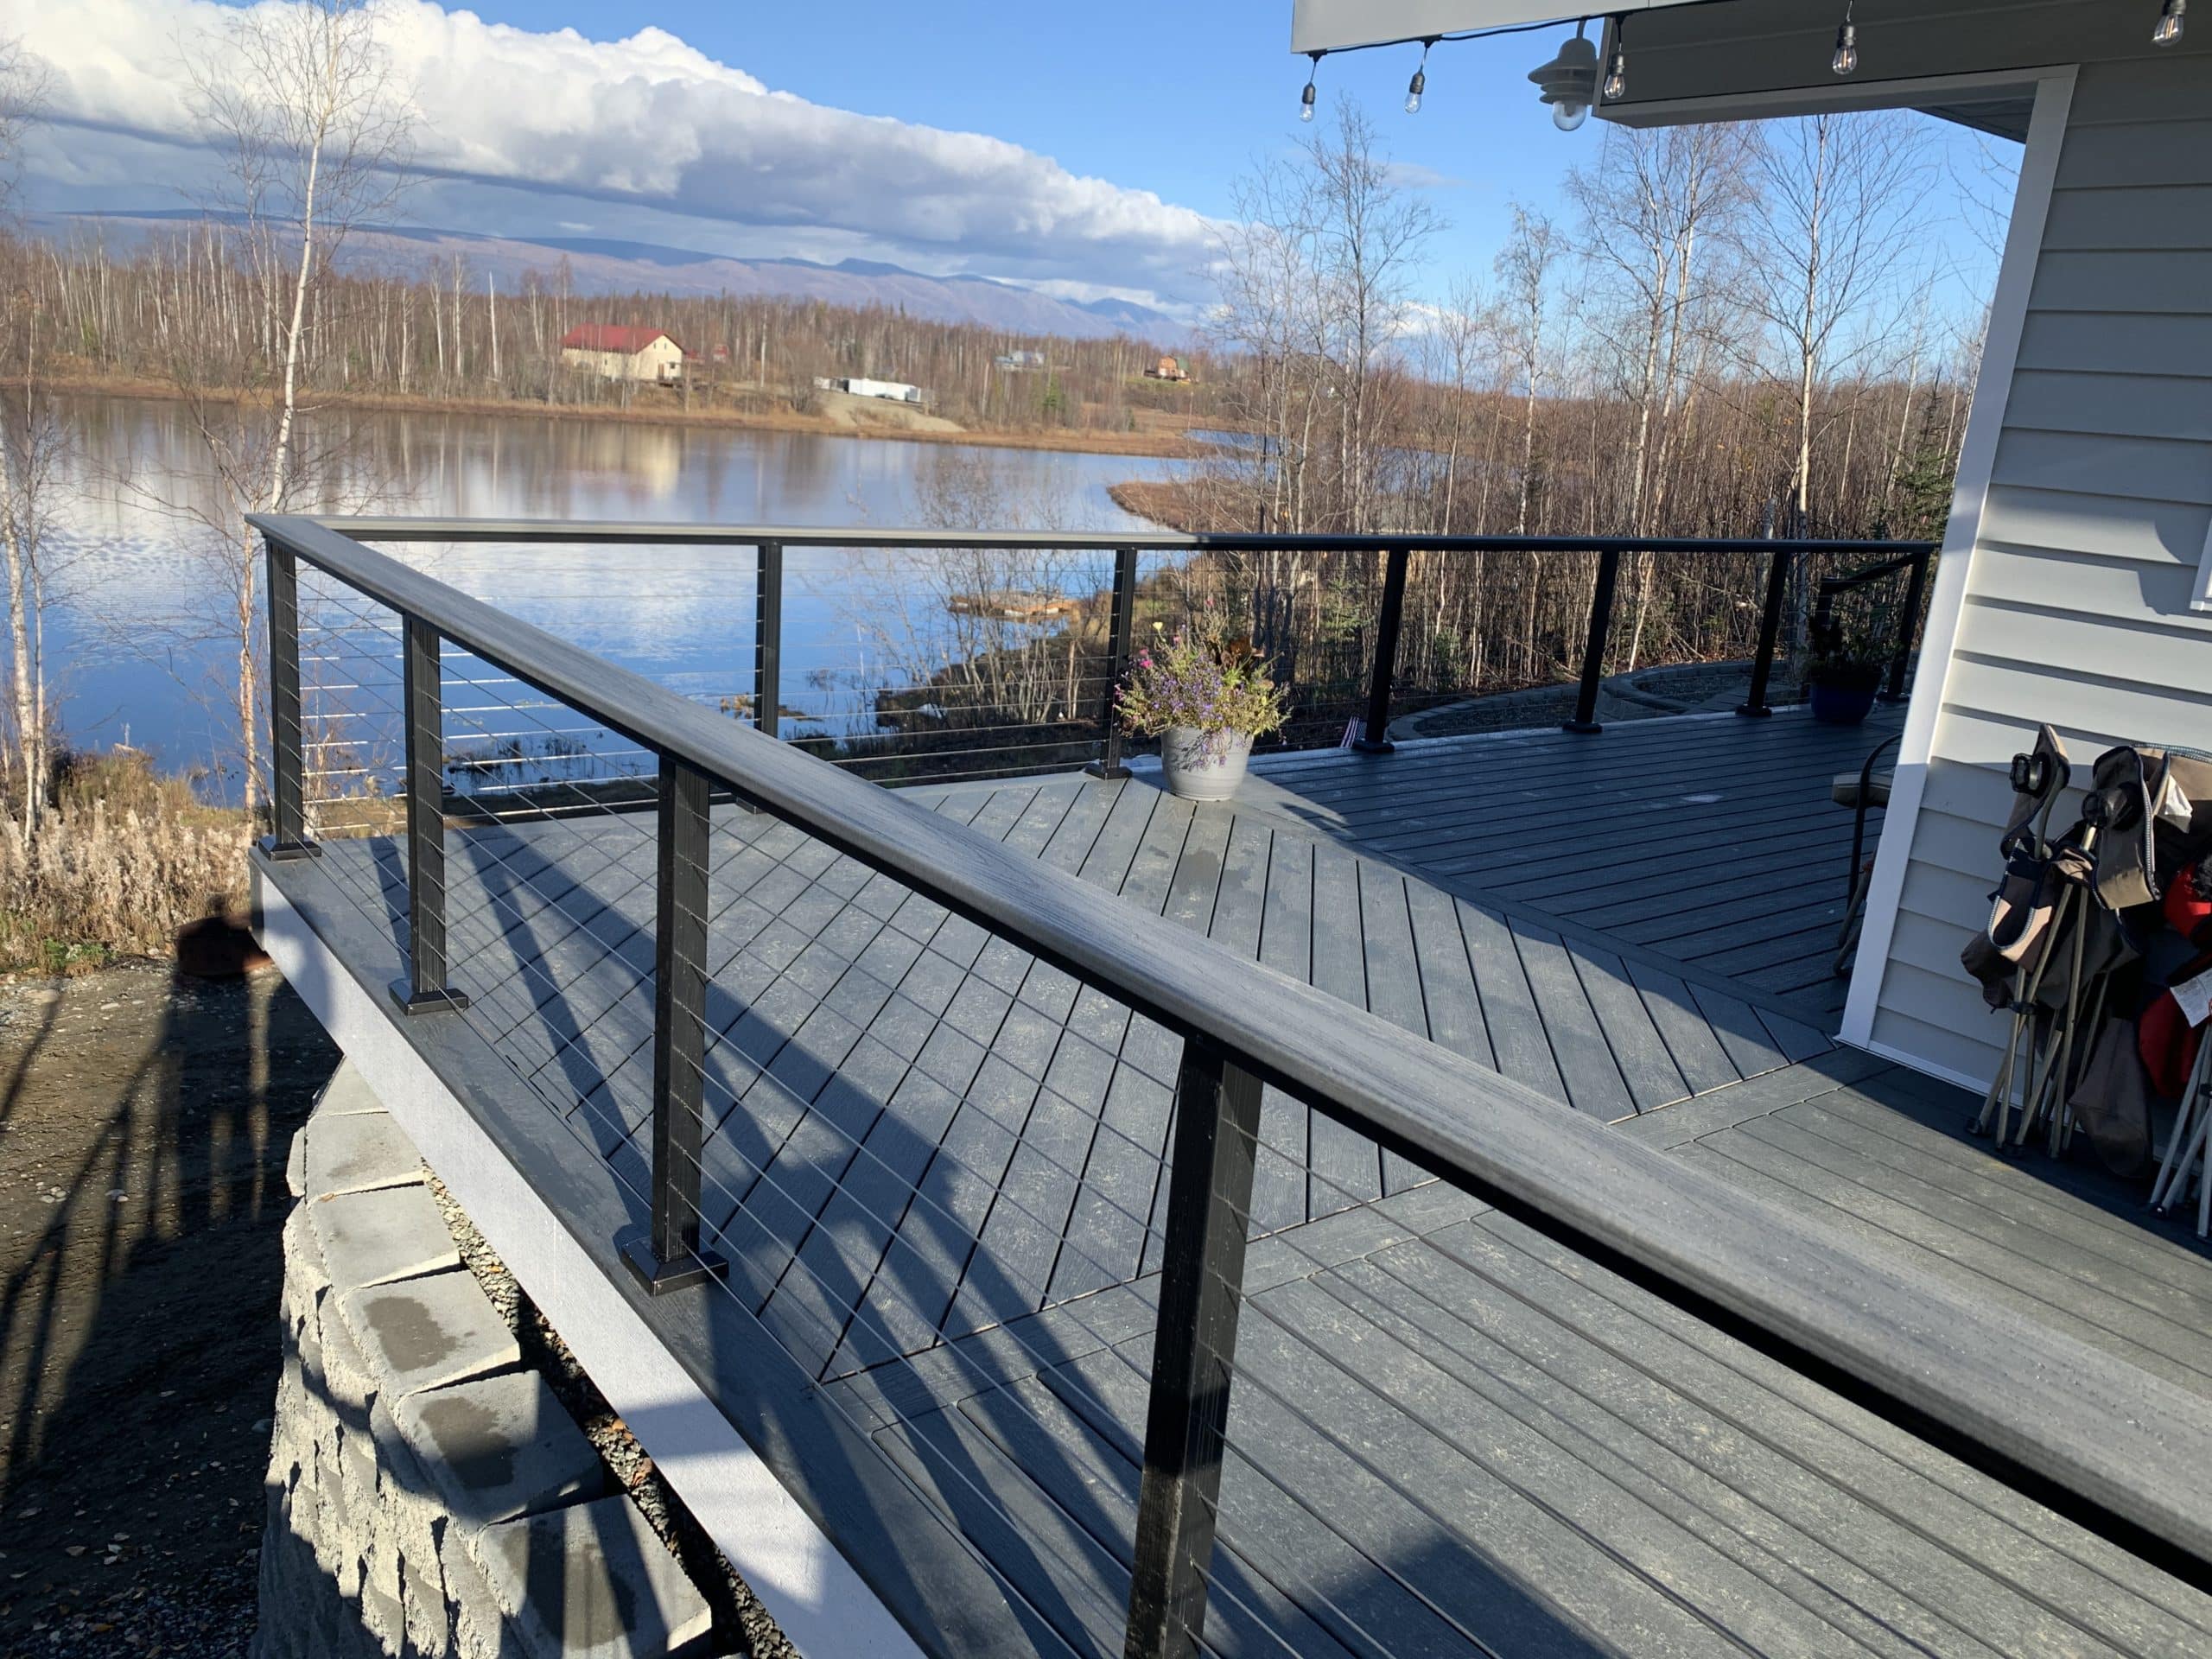
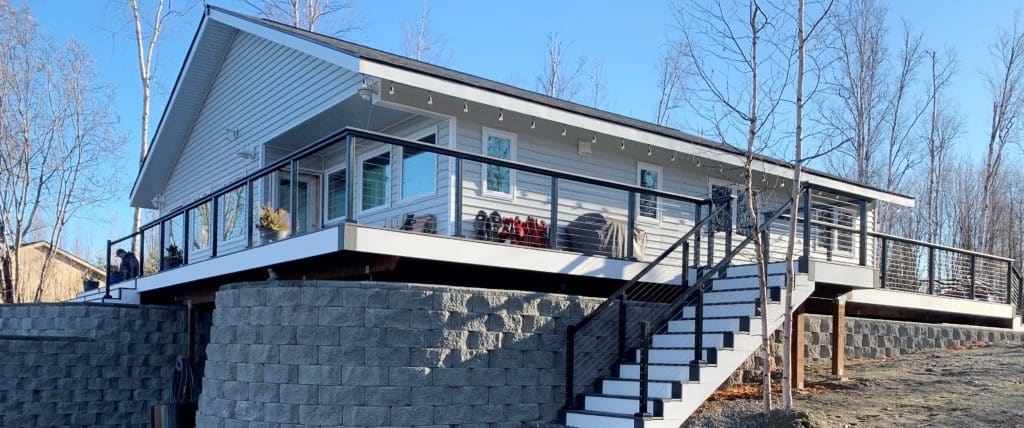
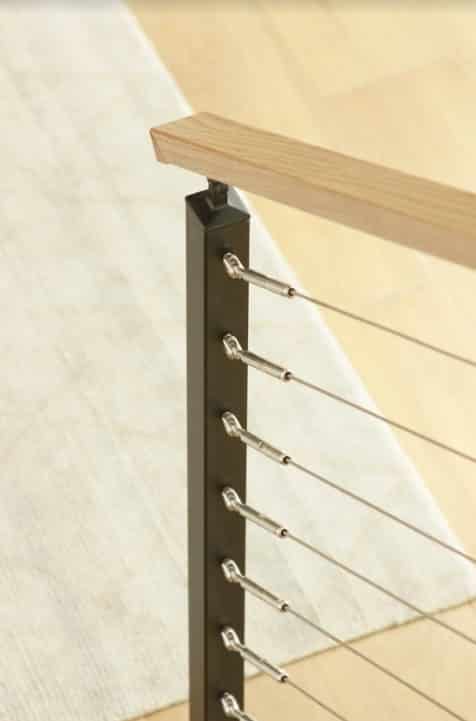
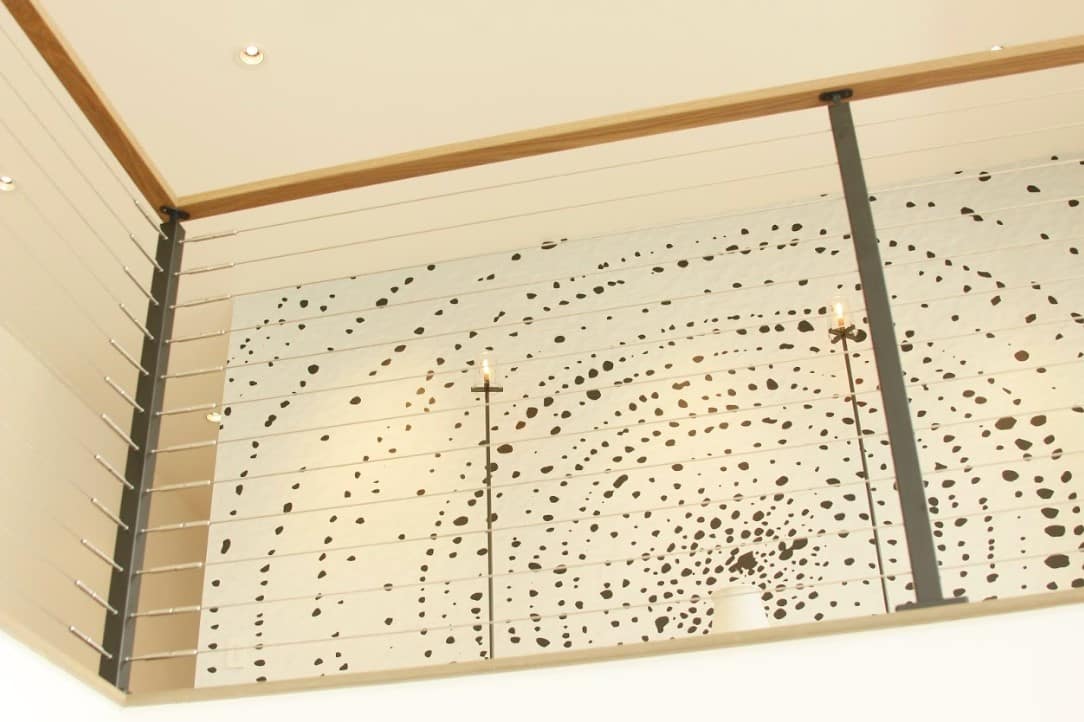
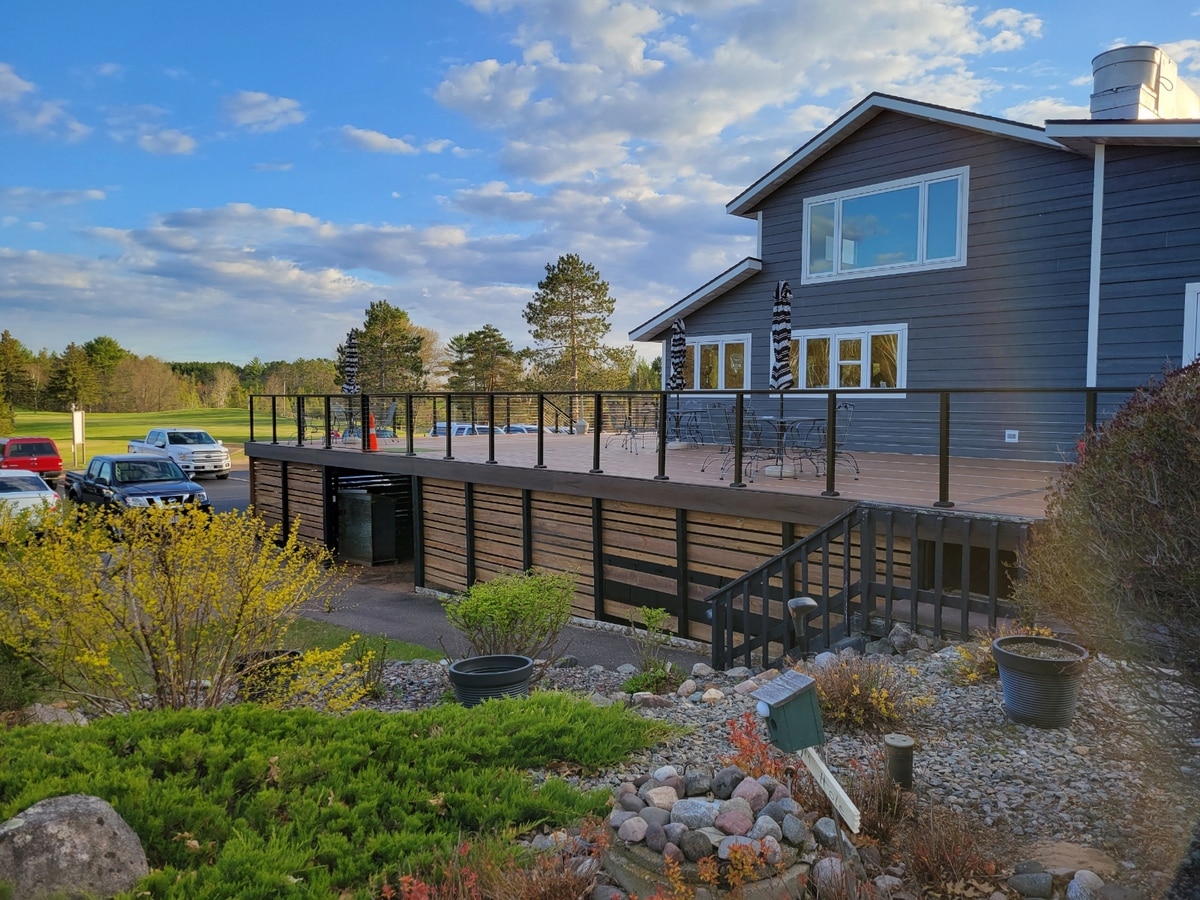
They added new siding, new decking, and railing off the clubhouse this past fall and winter. They demolished the existing concrete deck and vertical 2 x 2 wood railing and replaced it with Armadillo Composite Decking and finished it with RailFX aluminum cable railings in black. A hitting mat was built into the deck for guests to use during events, and in keeping with the “seeing the view through the railings,” they built a 10-foot gate — two 5-foot gate openings — made with RailFX.  

The cable railing system by RailFX, hitting Jason’s minimum maintenance requirements, was installed in February. “RailFX was very user-friendly with easy-to-follow directions,” said Jason. 

Our customers would complain that they couldn’t see the view when they were sitting on the original deck, so we looked for something easy to install and didn’t block the view when sitting out on the deck.” ~ Jason

Complete and accurate measurements make all the difference

If you’ve installed cable railing for level runs, you’re familiar with setting and installing posts and running the cable through for a completed project. When it comes to stairs, it takes more planning to make sure you have the right measurements and materials.

We’ve compiled tips to consider from some of the most common mistakes we typically see when orders come through to our team of experts. If you have a tried-and-true tip you’ve discovered while installing RailFX on stairs, we’d like to hear about it. Contact us at marketing@railfx.net.

Tip: Include stairs in your project drawings

Example of incomplete stair measurement details.

stair pitch rendering

We often find the stair details are missing from drawings, and simple mistakes happen. We’ve detailed some top tips to set and install stair posts for the cable to have the proper tension.

It is important to note on the stairway runs; no two are alike. Once we receive an order at RailFX, more often than not, we may ask for additional information — pictures and measurements — when stairs are involved. In some cases, we may need to requote a project if there is new information or a difference in layout from the original takeoff.

Stairs are framed differently from project to project, and most drawings we receive (including CAD drawings) do not show the stair framing. This is why we encourage our customers to submit the entire drawings including stairs.

Tip: Proper measurement and angle ensure no setback

The first step to installing stair posts is to measure the stairs’ nose-to-nose distance and angle to determine the total number of posts beyond the top and bottom. Without the proper stair angle and accompanying drawings, the cable may not follow the angle properly, a significant setback to your project’s completion.

Please note, code rules a 6-inch sphere should not pass through the triangle gap formed between the stair riser, stair tread, and the bottom edge of the bottom rail. Always check with your local building codes before installing.

Tip: Anchor the top and bottom posts first

Once the spot for each post is determined (RailFX recommends maximum post spacing 5-feet on center*, including stairs), mark each post spot on the stair treads. Anchor the top post first, making sure it’s plumb. Leave the lower post and any other flexible for installing cables.

All of our posts are pre-drilled and slotted unless a customer requests a blank post. Our stair posts come with additional length due to the differences in the rise and run, and they may need minor adjustments (cutting a bit off the bottom) as the rise and run will vary per project. Intermediate posts are slotted to accommodate the different angles of stairs and so the cable can pass through without kinking.

Tip: One less cable when transitioning to stairs

Typically, on a level run with 36-inch-high rails and without bottom rail, you will use ten cables. When transitioning to the stairs, you’ll remove a cable (nine cables without the bottom rail) because RailFX stair systems are post-to-post top rail configurations. Conversely, if there is a bottom rail desired, eight cables are required for level runs and seven for the stairs.

In the case of 42-inch-high rails, the level run will use 12 cables without the bottom rail and 10 with a bottom rail. The stairs will be quoted at 36-inches for code compliance and the top three cables will terminate prior as you transition to the stair.

Tip: Determine your handrails

No matter which RailFX cable railing system our customers order, we recommend they order either the RFX100 or the RFX250 for the stair rail. Our adjustable over-the-post hardware, which sits on top of our predrilled intermediate slotted posts, allows the rail to run continuously from top to bottom and articulate to the rake and angle of the stairs.


For example, if a customer selects the RFX300 top rail with a stair section, we will quote the RFX100 elliptical stair rail. If a customer selects RFX200 or RFX400 with a stair section, we will quote the RFX250 square stair rail. However, if a customer prefers to use our 200, 300, or 400 systems, we will accommodate their wishes.


To achieve an ADA graspable handrail option, we can assist our
customers with a RFXADA grab rail to use along with our systems.


In this case, when using our 200, 300, and 400 over the post railings, the RFXADA sub rail will be installed sitting under the preferred over the post top rail. The install is more complicated and features two rails instead of our typical post to post one rail system.


Once all posts are Installed according to your stair rise and run, follow our cable installation instructions to ensure your cables are correctly spaced, tensioned, and finished.


At RailFX, we make it easy for you. Upload your drawings and provide details about your project using our online quoting system, and we’ll contact you with any questions or concerns.

*Always check with your local building code.

Our over the post stair rail.

Over the post stair with callouts

Our RFXADA grab rail used with our RailFX400 Top Rail.

Railing

Case Study: Jeremy Bower of Big Foot Decking & Services

Wasilla, Alaska

Project Summary: Wrap-around Deck, Aluminum Cable Railing

After years working on the north slope of Alaska, on flow control equipment on oil rigs, Jeremy Bower called it quits to start his own custom decking company. His schedule was demanding, two weeks on the job and away from home, two weeks at home. During his time at home, he worked side jobs, building decks, to make some extra cash. It paid off.

“Shortly after I quit the north slope job, I went all in and obtained my contractor’s license. From sheer word of mouth, I’ve been busy ever since,” said Jeremy, owner of Big Foot Decking & Services in Wasilla, Alaska, serving the Mat-Su Valley, Anchorage, and Fairbanks territory. He confirms that they do build decks in Alaska all winter long.

He took trade classes in high school and even built a house as part of the class project. Fourteen years later, he went back to where it all started. He redesigned and built a new 550-square-foot deck on the same house as one of his first projects with his new business.

Jeremy loves to design custom decks for his customers, like this project in Big Lake, Alaska. The customer gave Jeremy free reign on the design for a new deck on the house. After presenting three different options with creative ways to work around a large retaining wall, he installed a wraparound 1,050-square-foot deck with high-end composite material using two tones to complement the home’s architectural style.

“We threw in some detail work on the fascia and stairs, using a herringbone picture frame all around,” added Jeremy. He doesn’t cut corners. To finish the ends of the deck boards, he cuts the ends at 45-degrees and glues a piece of board to the end, so it looks like the board is coming up and over the edge without having to use a fascia board, and you never see the scalloped bottom. It takes additional time, but the beauty is in the details.

To finish the custom decking project, Jeremy found RailFX through his supplier, Spenard Builders Supply. “My supplier called me up to see a demo of the railing,” said Jeremy. “I liked the simple design, pre-drilled holes, and it was easy to install.”

Jeremy used the RailFX Aluminum Cable Railing System in black for the full wrap around deck, including the stairs. He added a “cocktail top rail” using the composite decking complementing the black RailFX railing system on the level runs. The stair runs use RailFX 250 square top rail.

“I plan to use RailFX again and make it my primary cable railing brand for 2021,” he said.

Wrap-around Deck, Aluminum Cable Railing

Your indoor stairway design can create a big impact on your home’s overall style.  When homeowners choose an indoor cable railing project to define their stairway’s design, the results are always impressive.

Not only is cable railing designed to be safe and low maintenance, it can also enhance any residential or commercial project. Here’s our favorite indoor stairway design using cable railing, featuring high-performing stainless steel and aluminum railing for optimized style and effective protection.

Highlight Your Home With Cable Railing

Stairways are often one of the first things people see when they open the front door.

“Although it’s not necessarily the focal point of your home, or the place where you spend the most time, it’s still a very important area,” states Country Living. Homeowners that are looking for ways to create a visual impact with their interior design should invest attention in their staircase.on 

This homeowner was able to create a stunning first impression by featuring large pieces of art on both the main and second floors, along with plenty of windows in the entryway. The home’s stairway design beautifully helps direct attention toward the impressive paintings.

The featured cable railing systems are easily adaptable to any kind of project, whether it’s an interior stairway or exterior deck. And because of the open design of the railing, your home feels larger, thanks to the unobstructed views. The cable railing helps to achieve this impressive open style in the home, but it delivers more than aesthetic benefits.

Because the home’s design allows for more natural light and outdoor views, the homeowners will receive multiple health benefits including increased vitamin D, higher productivity levels, better sleep and more.

Give Authentic Design Room to Shine

The home’s second floor design is just as stunning as the main floor; the homeowner included more bold visual art in the stairway landing space to showcase their personal taste and give it a more finished look.

“One of the most difficult things to do with a room is to define it with an overall aesthetic that ties the space and its furnishings together. Large abstract paintings are perfect for this goal since they can be interacted with according to their aesthetic values,” according to IdeelArt.

“Formal artistic elements within a painting such as line, color, texture, shape and pattern, can set the tone, so to speak, for an overall design by creating a visual language for the room”, Ideel Art continues. Because this large black-and-white piece is the focus of the space, other design elements in the room follow its visual direction.

By using the featured cable railing design on their indoor cable railing project, the look is enhanced even further. Everyone in the home can enjoy unobstructed views of the art, the landing area and the openness of the entire space, whether they are on the first or second floor.

modern interior railing

Modern Design With Integrity

Even though the cable railing design here is minimal, the RailFX® fittings and cable products used come with strength and structural integrity guaranteed. All of the fittings and cables are tested to durability requirements. The railing systems work in indoor and outdoor projects, and in both residential and commercial applications.

The featured cable and railing fittings are available as part of the FlexFX program, so homeowners can create any indoor cable railing project design (with wood, metal, or sleeved end posts) along with FlexFX stainless steel fittings and cable to fit their personal style.

The cable can be cut and instered into the hardware on-site easily and the fittings screw into the posts. Plus, FlexFX features our exclusive Push-Lock® fittings which do not require any special tools for installation. Simply push the cable into the fitting and it locks.

The kits come with hardware fittings for both ends of the cable run, all fasteners necessary, your choice of cable and installation instructions. Some kits also come with the option of purchasing an accompanying tool kit.

RailFX interior rail
RailFX interior

Solutions for Your Indoor Cable Railing Project Stairway Design

“In a sense a stair is one of the most important pieces of architecture in a home,” writes architect Bud Dietrich for Houzz. Stairways are a focal point in many interior designs and are frequently used to capture life’s big moments (like prom or wedding pictures).

“And as a day-to-day utilitarian item, a stair is a wonderful way to choreograph movement through a home,” writes Bud. “It’s no wonder that architects and designers spend so much time designing stairs, and that true craftspeople build stairs that are absolute joys.”

When homeowners choose a cable railing system in their stairway design, the possibilities (and solutions) are limitless. Using RailFX® cable railing products helps homeowners achieve open design, long-lasting style and structural integrity in their project.

Modern Interior Rail

By working with RailFX, you get the highest quality aluminum railing systems, stainless steel fittings and stainless steel cables; all of which work together to create a stunning stairway design. You can contact us with questions about your next project, and get a quote on your job within 48 hours.

Get Your Deck Safety Toolkit

Enter your email below to access expert resources and help promote safer outdoor spaces.