FOLLOW US

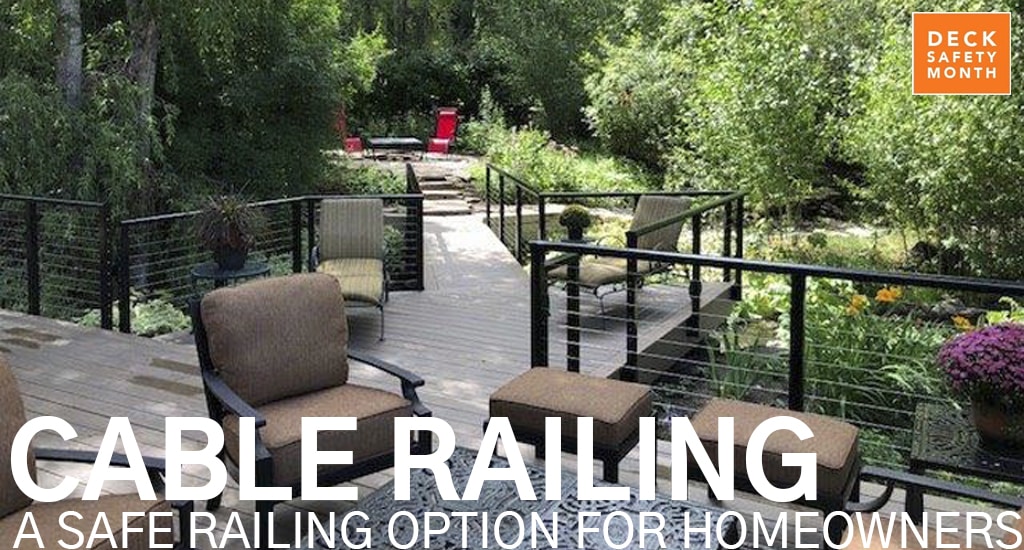
Are you a railing industry professional or DIY enthusiast looking for an easy and efficient cable railing installation solution? At RailFX, we understand the challenges you face when it comes to finding a durable, budget-friendly system. That’s why we’re excited to introduce our latest innovation: the RailFX Express Mount Brackets™. These game-changing brackets simplify cable railing installation, saving you time and money.

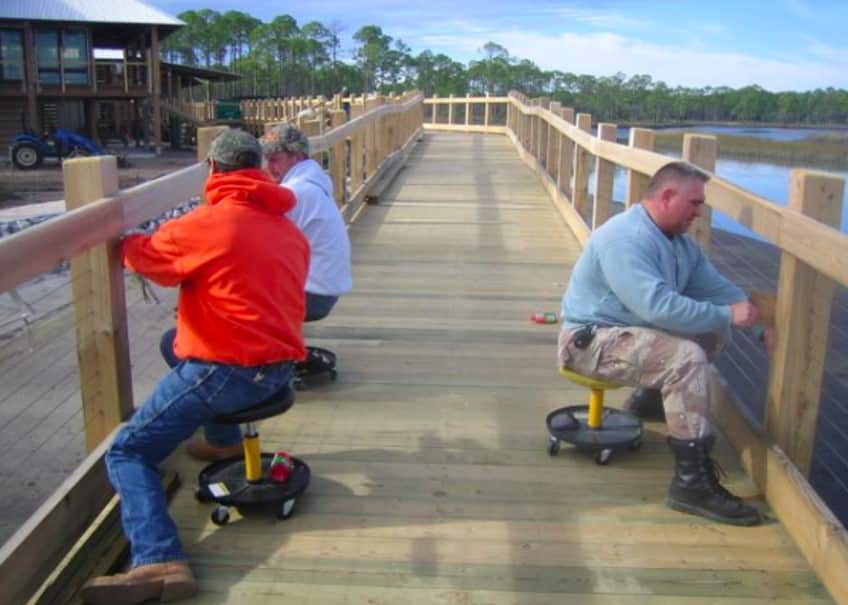
Express Mount Brackets are designed with your convenience in mind. By eliminating the need to drill through wood posts, you can say goodbye to the tedious and time-consuming process of installing cable railing. This breakthrough solution significantly reduces installation time, allowing you to complete projects more efficiently. In addition, the Express Mount Brackets require fewer cables and fittings, resulting in a cost-effective solution that doesn’t compromise quality.

Time-Savings and Safety
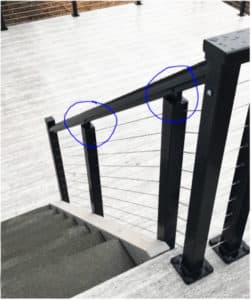
At RailFX, we’ve made it our mission to simplify the installation process while engineering railing systems that meet or exceed all applicable safety codes and regulations. With our easy-to-use Universal Drilling Template, aligning brackets and ensuring proper cable spacing becomes a breeze.

To install cable railing using Express Mount Brackets, contractors or DIYers simply use the Universal Drilling Template to install the appropriate brackets on the post exterior, feed the cables through the brackets and tighten the cables to secure it. 

“Our goal was to make cable railing available to more people, especially those who love outdoor living and want to enjoy their view with minimal obstruction,” says John Moss, founder of RailFX.

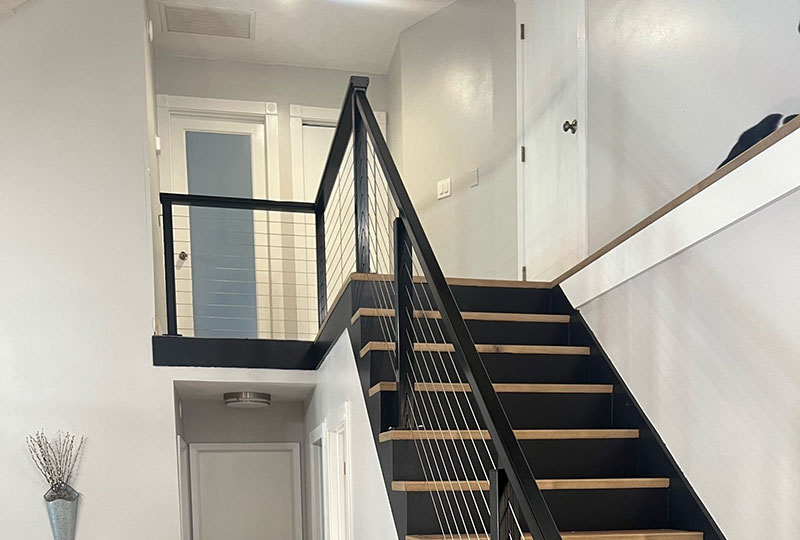
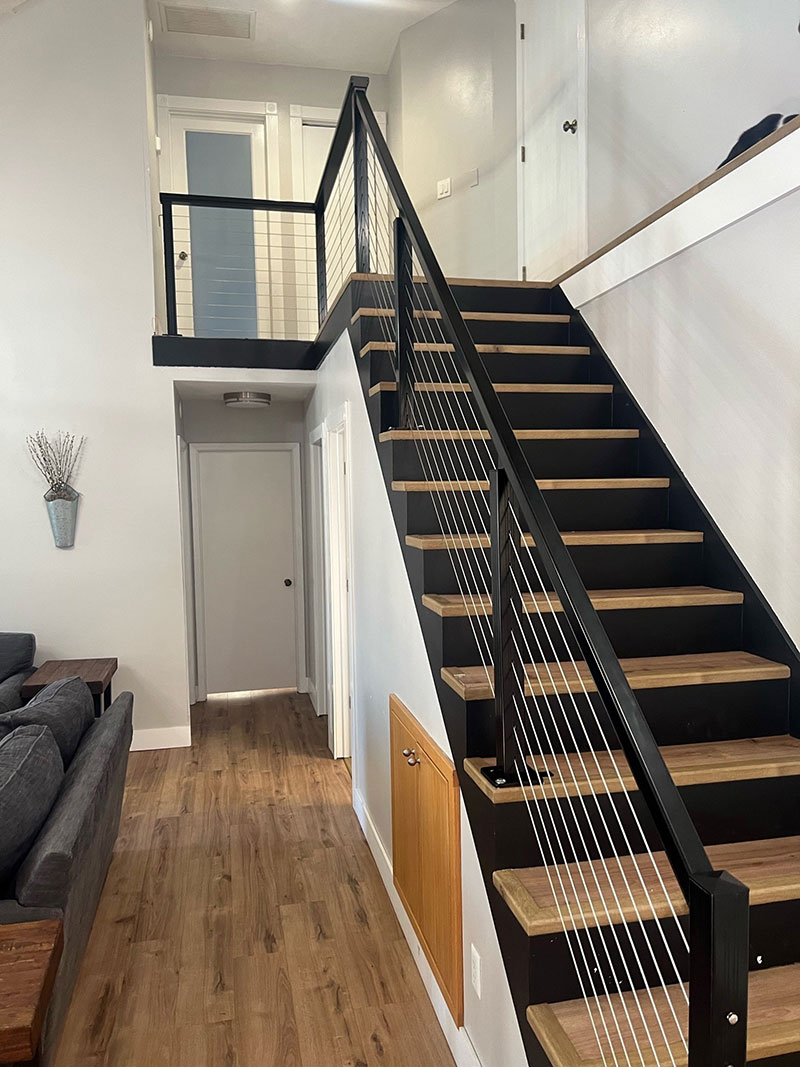
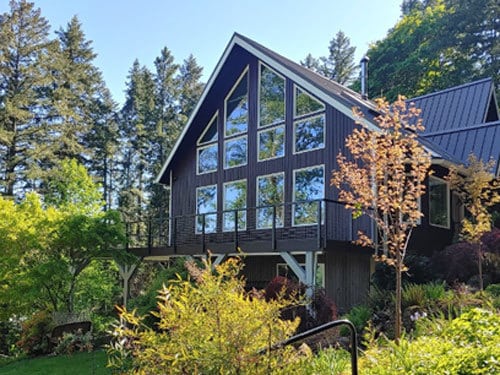
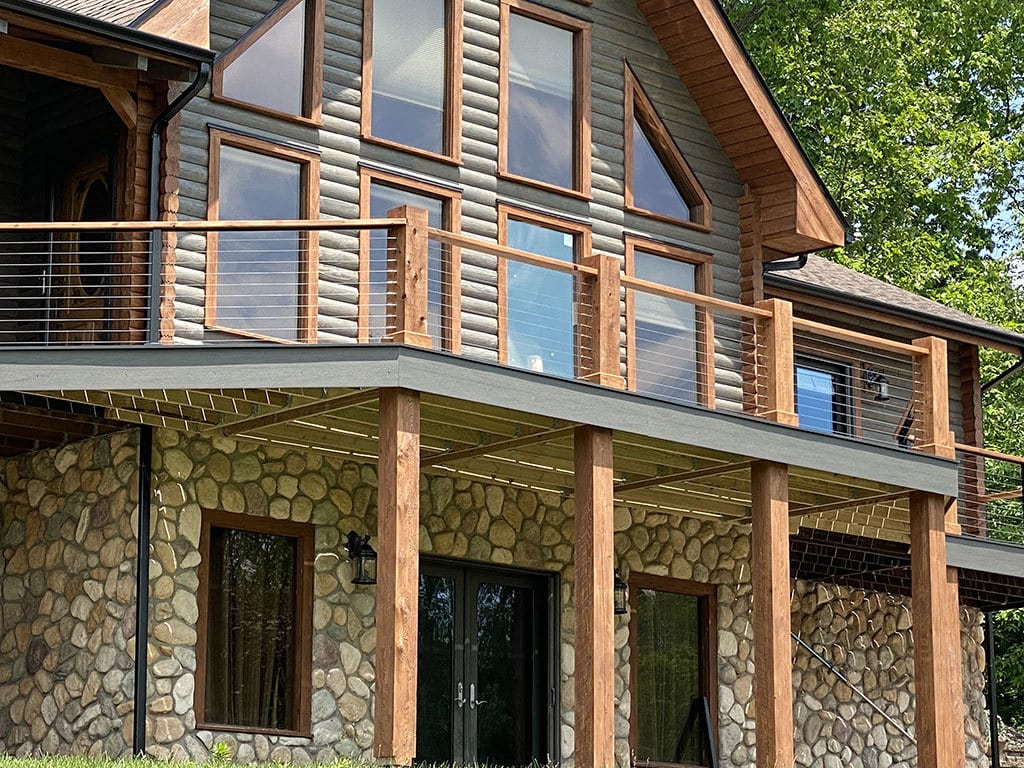
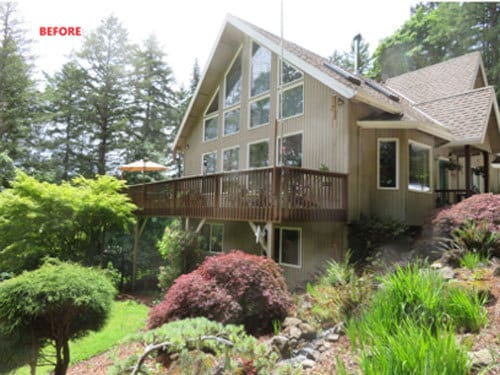
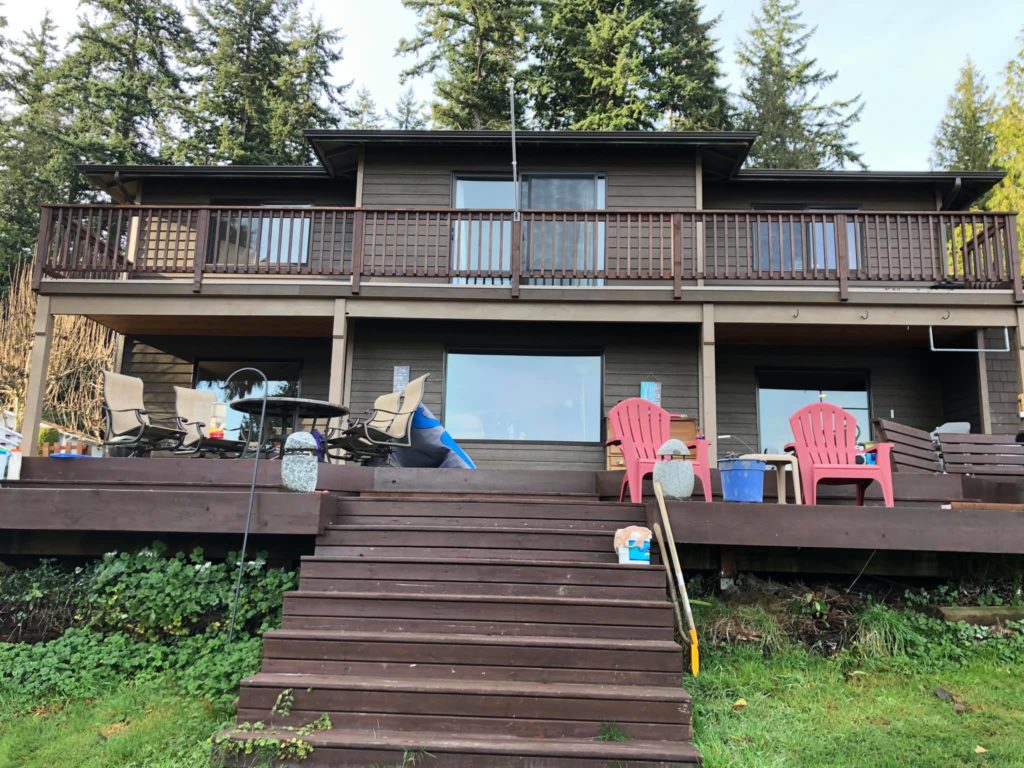
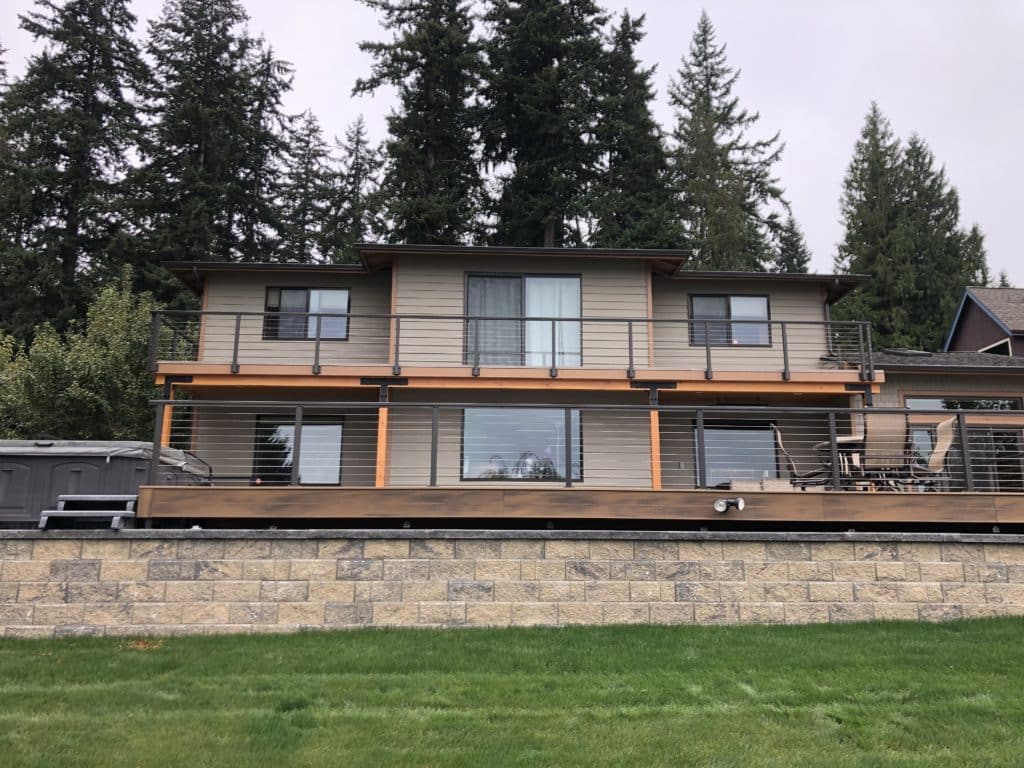
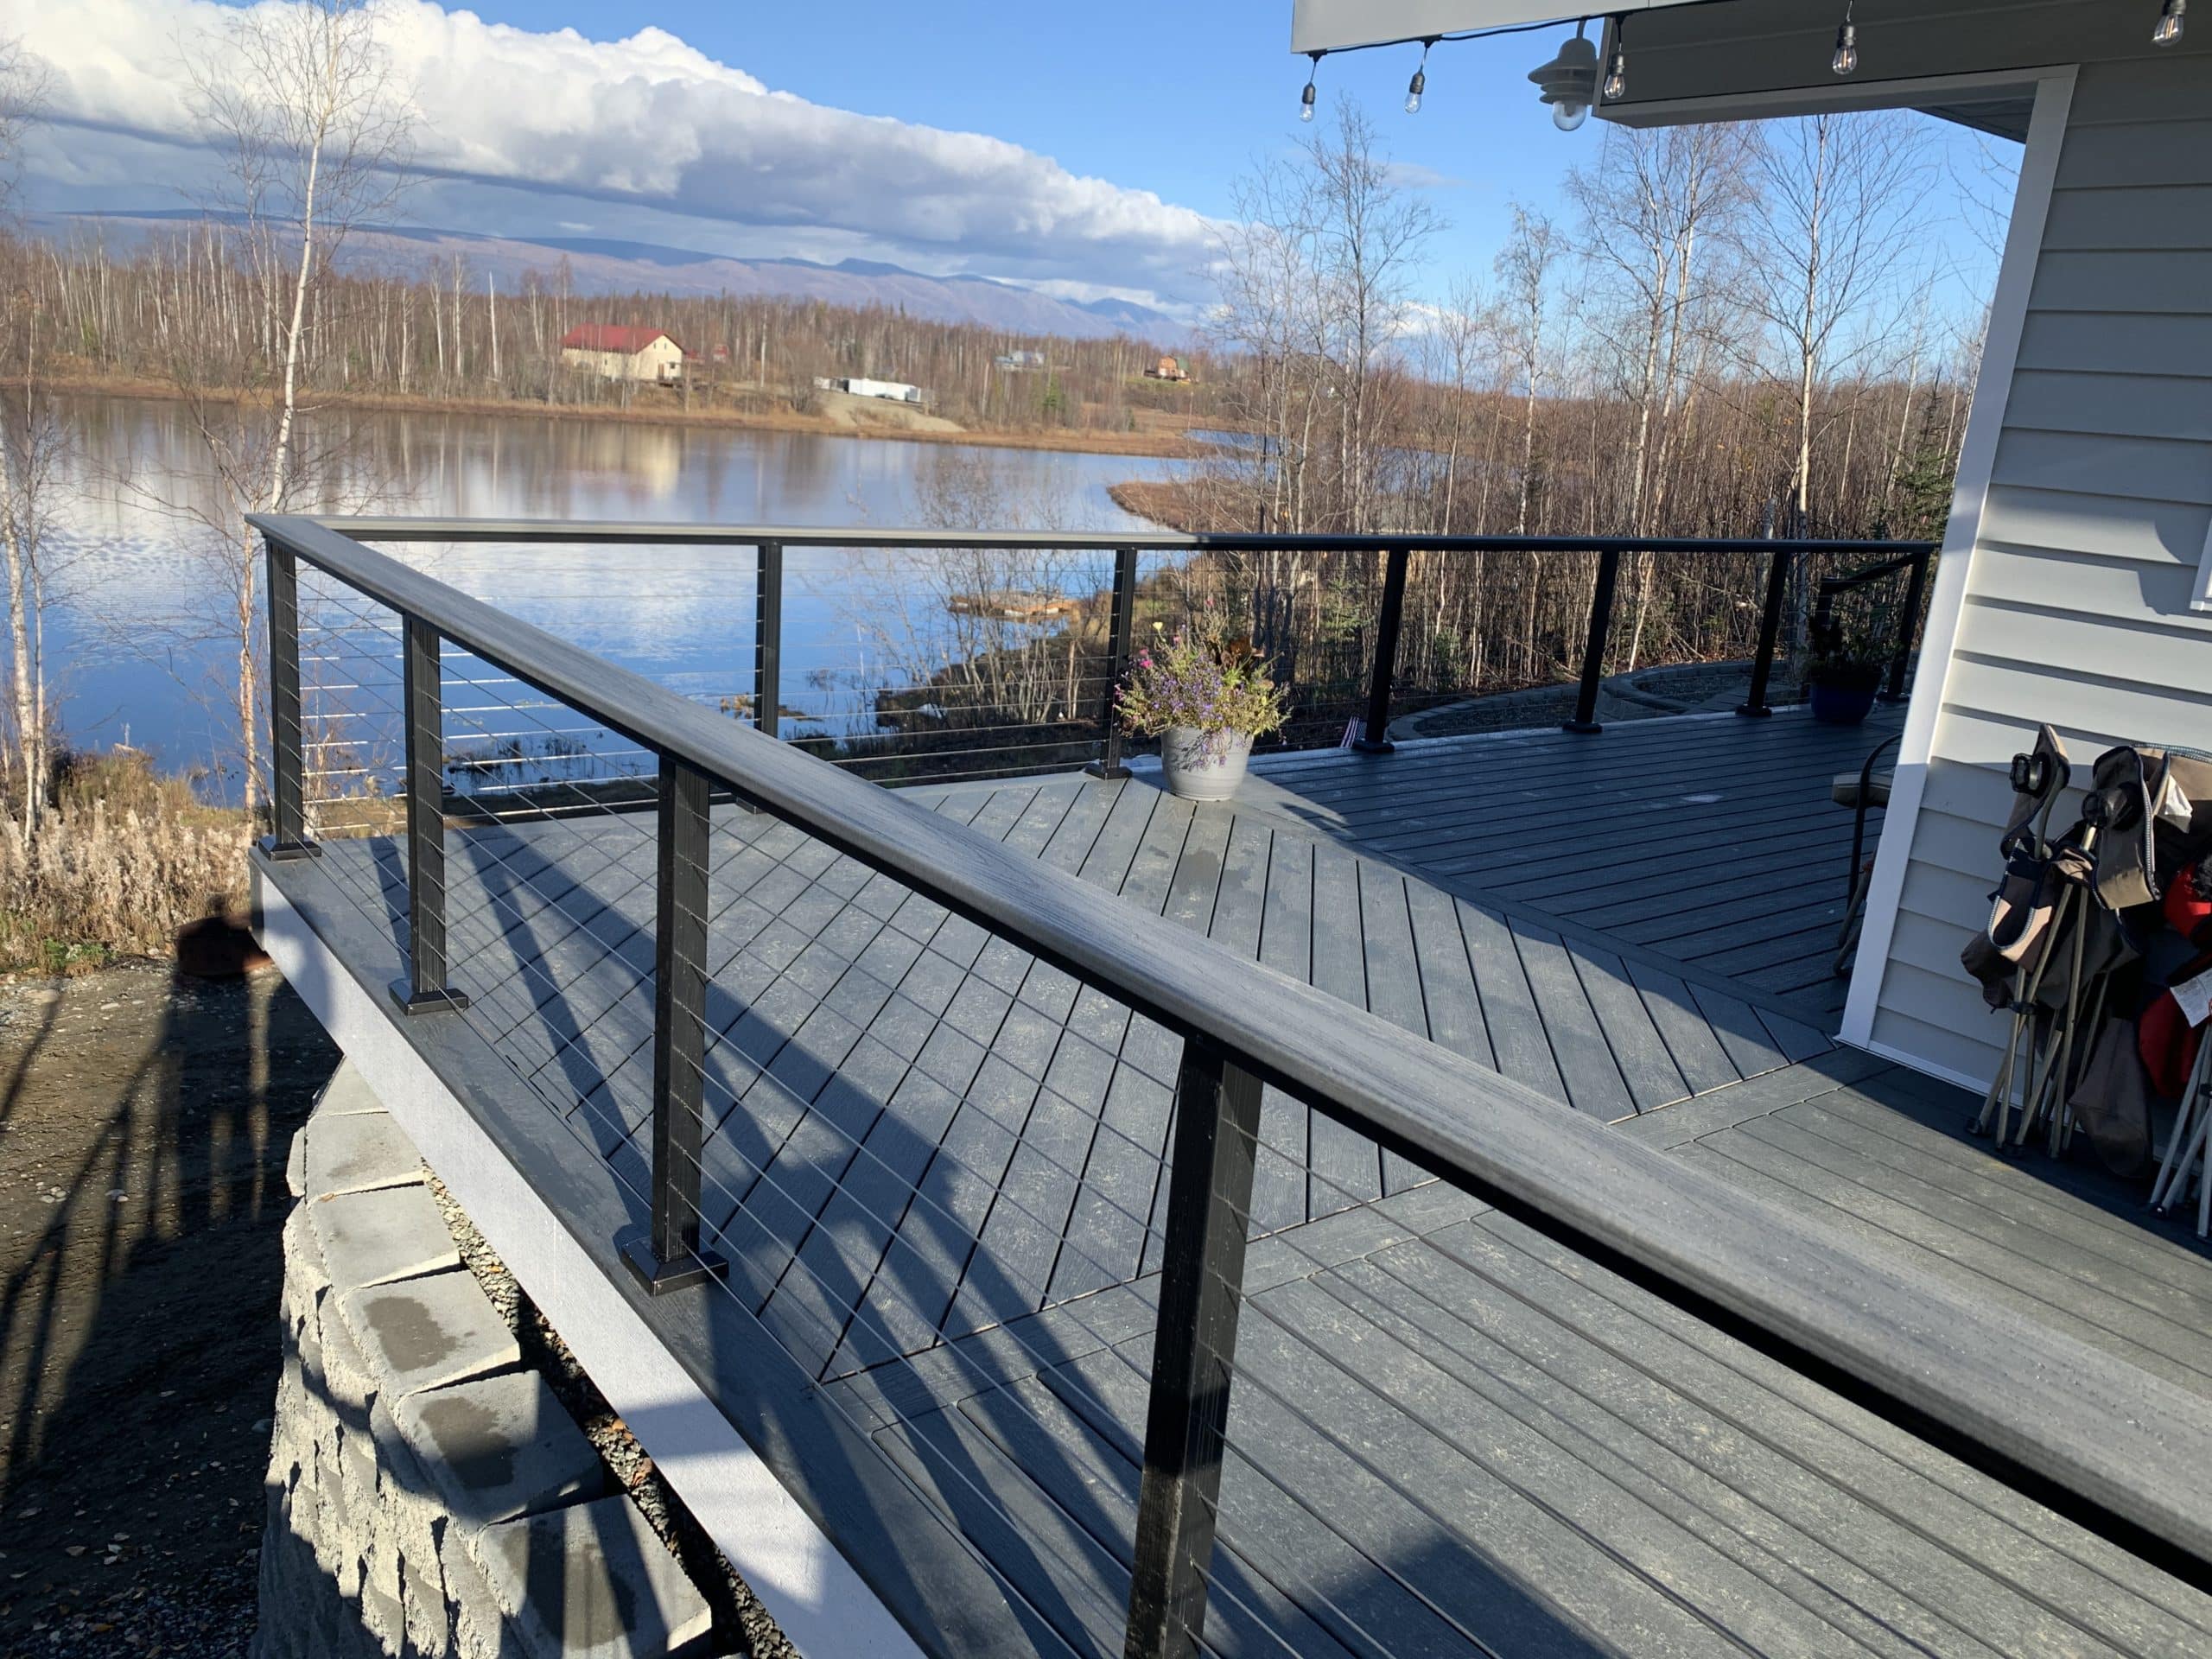
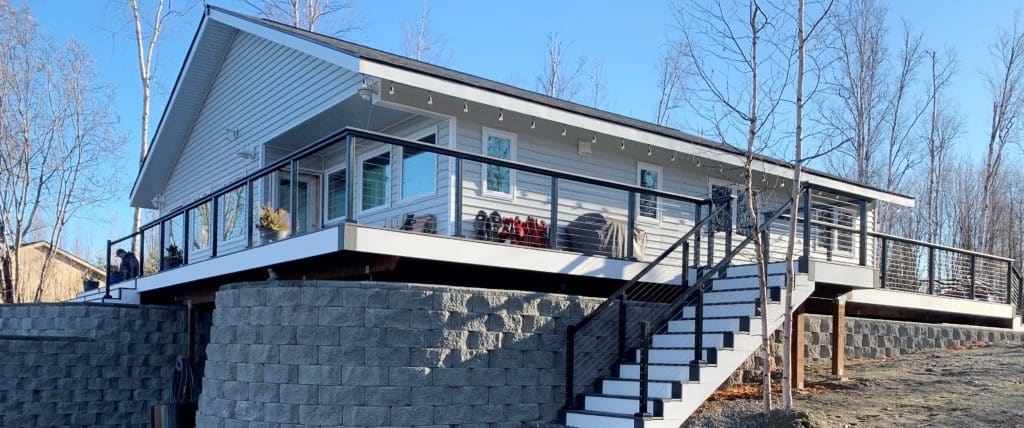
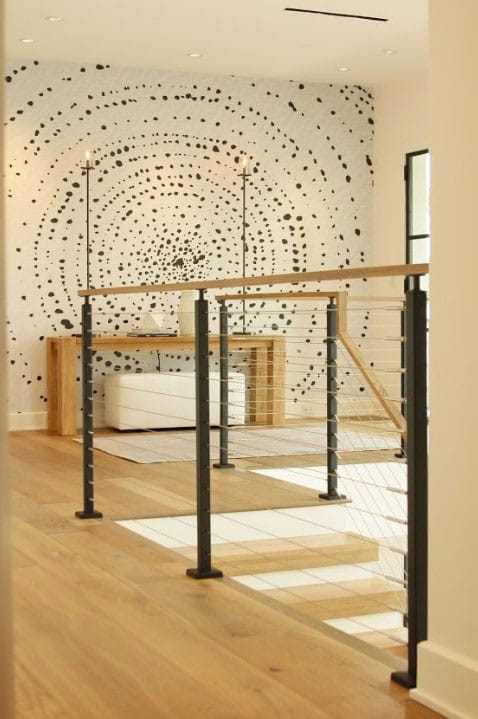
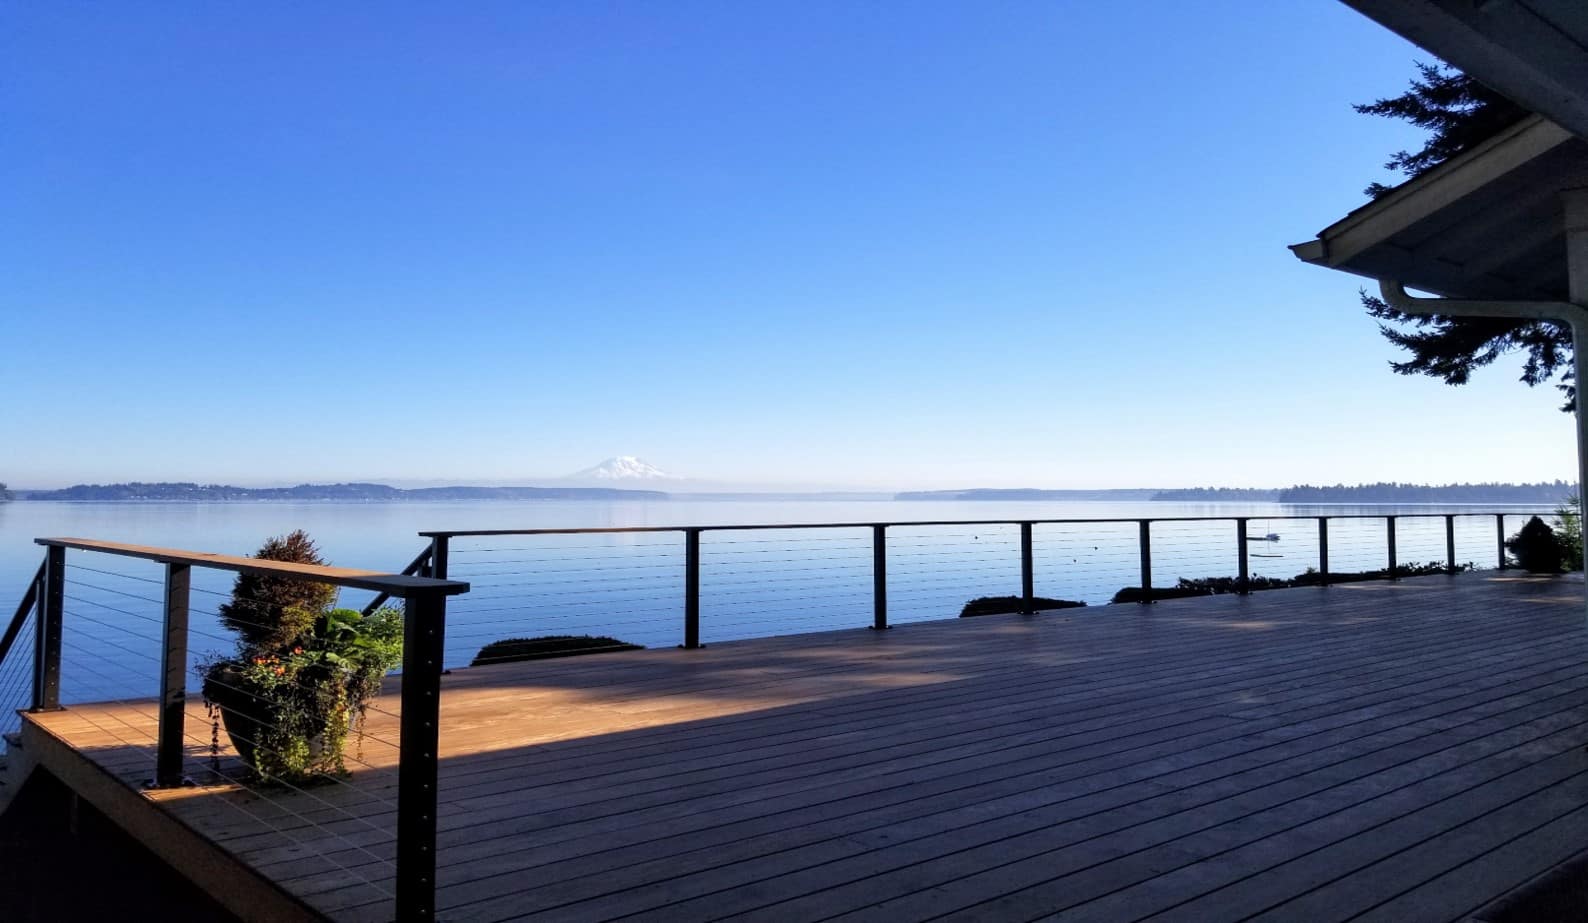
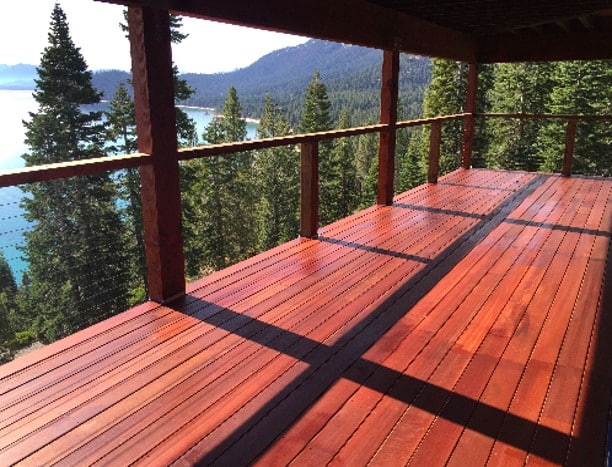
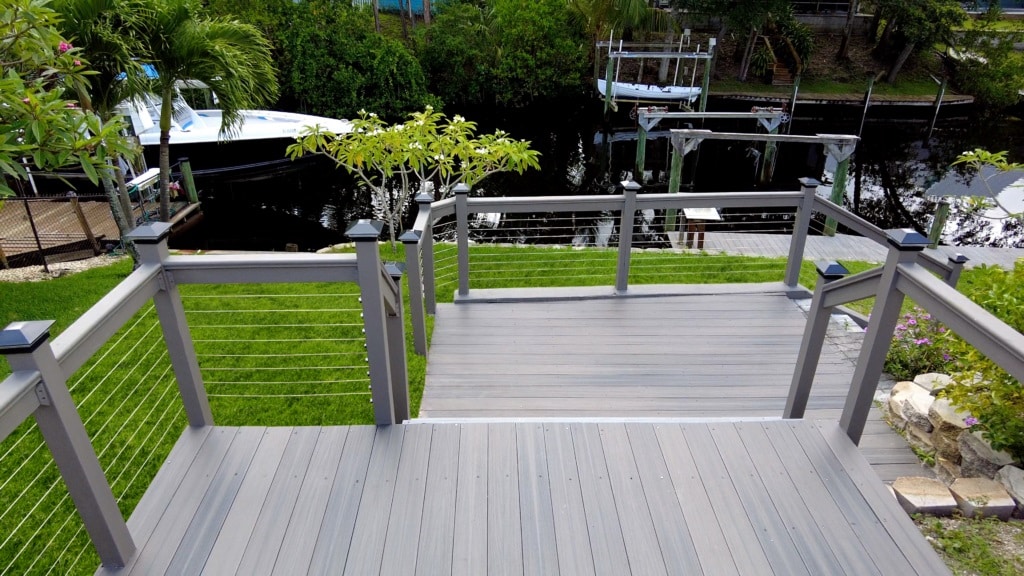
An affordable option to expand sightlines and maximize the view, Express Mount Brackets are compatible with Classic and Low Profile cable kits and work for both level and stair railing applications. The brackets can be retrofit on new or existing wood posts and are backed by a limited lifetime warranty.

“We are excited to be able to deliver an installation-friendly product that will make people’s lives more enjoyable as they expand their views and improve their outdoor spaces,” says John. “I’ve been in the industry for 30-plus years, and I couldn’t be more excited and passionate about the launch of this product — it’s truly the first of its kind.”

Cable railing made easy with Express Mount Brackets

Ready to simplify your cable railing installation process? Watch the step-by-step install video to see for yourself how cable railing is made easy with Express Mount Brackets:

Still curious how Express Mount Brackets will work for your project? Our team of cable railing experts are here to help, every step of the way. Whether you’re a professional contractor with experience installing cable railing or a DIY enthusiast, RailFX has the right railing system and installation tools for your project. Contact us today to learn more about our products and how we can help you bring your railing project to life.

RailFX Case Study

Using Cable Railing to Modernize a Home’s Interior


In the spring of 2021, Eric Johnson and his family moved to Florida, prepared to make significant upgrades to their new home. From gutting a bathroom and adding a bedroom, to replacing flooring and the stairway railing, the Johnson family had the vision to modernize the home’s look and feel.

Because the flooring was being replaced — including the stair treads — the oak wood and ornamental picket railing were removed. Instead of reinstalling the outdated railing, Wendy, Eric’s wife, suggested they consider cable railing after seeing it in an advertisement. “I am thrilled with how the railing turned out,” Wendy said. “It has helped to open up the great room and capture the modern look we were going for.”

“I thought she was looking at the cable railing for our dock leading to the lake,” said Eric. “She said we should use it for our stairway railing. After seeing the product and how it changes the look and feel of a space, I knew it was the right choice,” said Eric.

After sending pictures and measurements to RailFX’s easy “get a quote” system, he had a quote within 24 hours, and the product shipped within two weeks. “The only thing I forgot to order was the post skirts, and when I did order them, they were in my hands within a day or two,” Eric added.

Eric purchased the RailFX custom aluminum cable railing system with the flat top rail long before he was named VP of sales for Nationwide Industries and LockeyUSA, two PrimeSource Building Products’ brands, along with RailFX and Ultra-tec. “Since I purchased the product before I transitioned to my current role in the company, it was a nice test to see how RailFX services their customers,” said Eric. “The service I received was very impressive.”

Not only was Eric impressed with the customer service, but he also noted that the packaging and shipping were top-notch.

A product like this could be easily damaged during shipping, but everything was clean, and it was a complete kit; I didn't have to buy any extra or special tools," he added. "That's a nice feature not many rail companies offer.~ Eric Johnson

The Johnson family couldn’t be happier with their new stairway railings. “We’ve had several neighbors who now want to install cable railing not only on their docks but also for their interior projects,” said Eric.

The transformed stairway — which leads into the living room— ties together the other rooms of the house. It significantly modernized a home’s interior, something the Johnsons say makes their new house feel like home.

To learn how you can transform your room , contact sales@railfx.net.

Before

Before cable railing

After

modernize a home's interior

Back and front yards can be an escape for homeowners. For example, if the backyard expands the great or family room, then the front yard is surely an extension of the living room. And the front of the house is all about curb appeal — making it inviting for socializing with neighbors, relaxing, and resale value.

Personalizing outdoor spaces is on-trend. Decking for the backyard and the front porch can be the focal point of the overall design. Whether upgrading or building a new deck or porch project, consider adding the proper railings. Often an afterthought, railings not only serve as a safety feature but can also add an aesthetic appeal.  

There are various railings choices, and they are as solid of an investment as the decking or porch material. You want to choose — or recommend — the most suitable material because trends come and go, the railings can last as long as the deck. Seek materials that offer aesthetic flexibility no matter the changes made to the outdoor area year after year.

Consider cable railing for a modern, sleek, upscale look that will last. Cable railings’ minimal design means small decks and porches appear more spacious and, for both large and small spaces. The railings blend in rather than stand out, offering unobstructed views for maximum coverage.  

With proper installation, rest assured, cable railings are a safe option for any deck or porch. We’ve outlined common safety points, to make you feel comfortable choosing cable railing for your next project.

1. Safety

Post spacing and railing height should follow local code and guidelines. For level runs, height standards are 36- or 42-inch railings and posts no more than four to five feet apart for cable railings. If you’re unsure, check the latest 2021 International Residential Code (IRC) or local jurisdiction for the proper guard and handrail requirements.

2. Ladder Effect

Most deck pros and homeowners are concerned with the climbing risks or the “ladder effect.” A three-year study by the International Code Council (ICC) code Technology Committee (CTC) concluded that “the most current and thorough documentation available shows no indication that a problem exists and there had not been sufficient justification established to mandate a high level of climbability restriction on guards.”

Falls from railings — as well as porches, balconies, floor openings, handrails, and banisters — among children aged 18 months to four years are estimated to be less than an eighth of a percent (0.032) according to a joint report by National Ornament and Miscellaneous Metals Association (NOMMA) and National Association of Home Builders (NAHB).

3. Installation

Correct installation ensures that the cables are properly tensioned, limiting deflection, and never be spaced more than three inches apart, along with the post spacing recommendations mentioned above. With proper installation, cable railings should not allow a 4-inch sphere to pass between the cables.

4. Durability

Cable railings have high tensile strength and withstand at least 200 pounds of force — and with proper installation and tensioning, they will last for years with minimal maintenance. The 316-grade stainless steel makes cable railing corrosion-resistant and can withstand the most challenging climates, including coastal environments.

5. Options

Cable railing is available in 1/8- and 3/16-inch diameter 1×19 type 316 stainless steel. It is most common for residential applications to use 1/8-inch thick stainless steel cable. Lightweight and easy to maintain, the cable railing is code compliant with the proper tensioning.

At RailFX, we offer an aluminum cable railing system that makes ordering and installation easy. We also provide cable kits and FlexFX that incorporate our fittings into any residential application with the same ease.

With any product you choose, follow the manufacturers installation instructions, and call customer service for any help. This ensures a proper installation (to code), less call-backs, and a safe and beautiful result.

Before and After: Making the case for cable railing

If you’re a residential construction business owner — as a team of one or many — marketing your business may be low on the list or something you farm out for someone else to do. Word of mouth and repeat business may keep your project pipeline steady. Or your marketing may be high on the list if you lack a robust project schedule. With so many marketing options to consider — updated website, social media posts, Google my business, Google reviews, advertising, blogs, etc. — there’s one basic marketing tactic your customers and prospective customers love to see: project photos. Not just the completed projects photos, but before and after shots that make even the smallest projects look significant in transformation.

Before and after decking and railing projects

Consider a deck or railing transformation that may seem compulsory. Yet today there are so many material options to choose from, including the variety of colors, composite decking, to a variety of infill options for railings.

We’ve compiled several recent case studies that showcase a before and after makeover and rationale for choosing the products.

Ohio log home receives an update

After more than 20 years, Jill Wright’s log home’s deck transformed from a heavy log look with wood posts and wood railings blocking the beautiful view to more balance using different materials. When Jill sat on her porch, all she saw was logs. She installed a combination of posts, keeping the original wood posts in the front of the home, and RailFX black aluminum posts with the 1/8-inch cable infill. The finished project includes a wood top rail. Jill combined a traditional style with a modern approach to her railing project in an area that tends to use more traditional materials — honey oak, aluminum, and vinyl.


Wraparound deck with panoramic views

This wraparound deck and railing with panoramic views of the property needed replacing. Linda Evans’ client chose to replace it using composite decking in a vintage hue and added cable railings. Evans initially tried to talk the Greens out of using cable railing but soon lost the battle, and it proved to be the right call. Evans and her crew replaced the old wood railings on the second-story deck, including adding a stairway for accessibility. RailFX Aluminum Cable Railing System bronze posts, top rail, mounts, and 1/8-inch cable railing was installed.  To finish off the railing project, Evans used a RailFX cable railing custom gate in bronze. The client now enjoys the views of their 28-acres overlooking the valley where they raise their sheep, dogs and practice their green thumbs.


A complete decking project

Take this project from Berg Construction, where the original deck consisted of multi-levels. Shane Berg and his team demolished the whole thing and started over by making it one level. But they didn’t stop there. The composite decking material features contrasting colors — the body of the deck boards is gray with a picture frame board using a golden hue and a composite fascia to complete the project. From the fascia to the lighting and railing, a knowledge of the materials and how they perform helps your customers choose the proper decking material. They finished the deck with a RailFX aluminum cable railing system with bronze posts. 

In addition, Shane and his crew added a retaining wall with new landscaping to match the upgraded deck and railings along with Douglas Fir posts and beams and high-gauge, structurally rated connectors.


Photos are your signature of a job well done and one of the best marketing tactics that are low in cost and easy to execute. You can use your smartphone to take pictures or hire a local photographer specializing in real estate, home building, and architectural photography.

Complete and accurate measurements make all the difference

If you’ve installed cable railing for level runs, you’re familiar with setting and installing posts and running the cable through for a completed project. When it comes to stairs, it takes more planning to make sure you have the right measurements and materials.

We’ve compiled tips to consider from some of the most common mistakes we typically see when orders come through to our team of experts. If you have a tried-and-true tip you’ve discovered while installing RailFX on stairs, we’d like to hear about it. Contact us at marketing@railfx.net.

Tip: Include stairs in your project drawings

Example of incomplete stair measurement details.

stair pitch rendering

We often find the stair details are missing from drawings, and simple mistakes happen. We’ve detailed some top tips to set and install stair posts for the cable to have the proper tension.

It is important to note on the stairway runs; no two are alike. Once we receive an order at RailFX, more often than not, we may ask for additional information — pictures and measurements — when stairs are involved. In some cases, we may need to requote a project if there is new information or a difference in layout from the original takeoff.

Stairs are framed differently from project to project, and most drawings we receive (including CAD drawings) do not show the stair framing. This is why we encourage our customers to submit the entire drawings including stairs.

Tip: Proper measurement and angle ensure no setback

The first step to installing stair posts is to measure the stairs’ nose-to-nose distance and angle to determine the total number of posts beyond the top and bottom. Without the proper stair angle and accompanying drawings, the cable may not follow the angle properly, a significant setback to your project’s completion.

Please note, code rules a 6-inch sphere should not pass through the triangle gap formed between the stair riser, stair tread, and the bottom edge of the bottom rail. Always check with your local building codes before installing.

Tip: Anchor the top and bottom posts first

Once the spot for each post is determined (RailFX recommends maximum post spacing 5-feet on center*, including stairs), mark each post spot on the stair treads. Anchor the top post first, making sure it’s plumb. Leave the lower post and any other flexible for installing cables.

All of our posts are pre-drilled and slotted unless a customer requests a blank post. Our stair posts come with additional length due to the differences in the rise and run, and they may need minor adjustments (cutting a bit off the bottom) as the rise and run will vary per project. Intermediate posts are slotted to accommodate the different angles of stairs and so the cable can pass through without kinking.

Tip: One less cable when transitioning to stairs

Typically, on a level run with 36-inch-high rails and without bottom rail, you will use ten cables. When transitioning to the stairs, you’ll remove a cable (nine cables without the bottom rail) because RailFX stair systems are post-to-post top rail configurations. Conversely, if there is a bottom rail desired, eight cables are required for level runs and seven for the stairs.

In the case of 42-inch-high rails, the level run will use 12 cables without the bottom rail and 10 with a bottom rail. The stairs will be quoted at 36-inches for code compliance and the top three cables will terminate prior as you transition to the stair.

Tip: Determine your handrails

No matter which RailFX cable railing system our customers order, we recommend they order either the RFX100 or the RFX250 for the stair rail. Our adjustable over-the-post hardware, which sits on top of our predrilled intermediate slotted posts, allows the rail to run continuously from top to bottom and articulate to the rake and angle of the stairs.


For example, if a customer selects the RFX300 top rail with a stair section, we will quote the RFX100 elliptical stair rail. If a customer selects RFX200 or RFX400 with a stair section, we will quote the RFX250 square stair rail. However, if a customer prefers to use our 200, 300, or 400 systems, we will accommodate their wishes.


To achieve an ADA graspable handrail option, we can assist our
customers with a RFXADA grab rail to use along with our systems.


In this case, when using our 200, 300, and 400 over the post railings, the RFXADA sub rail will be installed sitting under the preferred over the post top rail. The install is more complicated and features two rails instead of our typical post to post one rail system.


Once all posts are Installed according to your stair rise and run, follow our cable installation instructions to ensure your cables are correctly spaced, tensioned, and finished.


At RailFX, we make it easy for you. Upload your drawings and provide details about your project using our online quoting system, and we’ll contact you with any questions or concerns.

*Always check with your local building code.

Our over the post stair rail.

Over the post stair with callouts

Our RFXADA grab rail used with our RailFX400 Top Rail.

Railing

Case Study: Jeremy Bower of Big Foot Decking & Services

Wasilla, Alaska

Project Summary: Wrap-around Deck, Aluminum Cable Railing

After years working on the north slope of Alaska, on flow control equipment on oil rigs, Jeremy Bower called it quits to start his own custom decking company. His schedule was demanding, two weeks on the job and away from home, two weeks at home. During his time at home, he worked side jobs, building decks, to make some extra cash. It paid off.

“Shortly after I quit the north slope job, I went all in and obtained my contractor’s license. From sheer word of mouth, I’ve been busy ever since,” said Jeremy, owner of Big Foot Decking & Services in Wasilla, Alaska, serving the Mat-Su Valley, Anchorage, and Fairbanks territory. He confirms that they do build decks in Alaska all winter long.

He took trade classes in high school and even built a house as part of the class project. Fourteen years later, he went back to where it all started. He redesigned and built a new 550-square-foot deck on the same house as one of his first projects with his new business.

Jeremy loves to design custom decks for his customers, like this project in Big Lake, Alaska. The customer gave Jeremy free reign on the design for a new deck on the house. After presenting three different options with creative ways to work around a large retaining wall, he installed a wraparound 1,050-square-foot deck with high-end composite material using two tones to complement the home’s architectural style.

“We threw in some detail work on the fascia and stairs, using a herringbone picture frame all around,” added Jeremy. He doesn’t cut corners. To finish the ends of the deck boards, he cuts the ends at 45-degrees and glues a piece of board to the end, so it looks like the board is coming up and over the edge without having to use a fascia board, and you never see the scalloped bottom. It takes additional time, but the beauty is in the details.

To finish the custom decking project, Jeremy found RailFX through his supplier, Spenard Builders Supply. “My supplier called me up to see a demo of the railing,” said Jeremy. “I liked the simple design, pre-drilled holes, and it was easy to install.”

Jeremy used the RailFX Aluminum Cable Railing System in black for the full wrap around deck, including the stairs. He added a “cocktail top rail” using the composite decking complementing the black RailFX railing system on the level runs. The stair runs use RailFX 250 square top rail.

“I plan to use RailFX again and make it my primary cable railing brand for 2021,” he said.

Wrap-around Deck, Aluminum Cable Railing

Homeowners have spent a lot more time at home in the last few years and are finding new ways to mingle work and everyday life in their homes. During this extended time indoors, homeowners are altering how their home functions for this next normal. 

Recent studies show DIY improvement projects are on the rise. As more people are working from home, they may be looking at simple and affordable ways to upgrade their interior space. 

Cable railings are a creative and effective way to change the look of a home on the inside. Traditionally used for exterior projects like decks, pedestrian bridges, walkways, and stairways, cable railings can also transform a staircase and landing, loft or balcony, and even hallways into a design statement. 

RailFX® offers the highest quality aluminum railing systems, stainless steel fittings, and stainless-steel cables that work together to create stunning designs for interiors. We also offer cable railing kits that are available in several combinations to accommodate existing posts and design situations, such as interior applications.

Cable Railings Indoors: Making an Entrance

staircase is, oftentimes, the first thing you see when you enter someone’s home. It can be a design focal point or just another ordinary staircase. While railings offer safety, they can also dress up an otherwise functional space. A great staircase and a great railing go hand-in-hand. 

Cable railings offer homeowners the opportunity to accessorize ordinary and practical parts of the inside of their homes. It can change the entire look of an entryway. The use of cable railings can also blend in or stand out with just about any style of home and offers homeowners a simple and efficient way to upgrade and personalize their living space.


RailFX Balcony

Lofty Goals

Lofts or balconies offer open space and most often function as an all-purpose area for families with play areas, media rooms, home office, or a workout area. Many lofts and balconies are separated from the rest of the home and don’t have an open feeling. 

Cable railings are a great way to open up the area and make the loft area feel part of the whole home experience. The installation is also similar to an exterior decking application.

Passing Through

Hallways, landings, and other small and enclosed areas in the home are narrow and can feel cut-off or just a path to pass through. By installing cable railings in these key areas, the area will offer an openness of the space with unobstructed views never thought possible by traditional building materials. 

Opening up second-story hallways and landings may offer homeowners a more natural light and outdoor view and also a view of pictures or artwork normally only seen from one viewpoint. It offers homeowners a way to showcase their personal style.

Hallway landing cable railing

Interior Solutions – Easy as 1-2-3

Our FlexFX® program offers stainless fittings and cables for use with wood, metal, or sleeved end posts. So, no matter the style of the home — traditional, contemporary, or modern — homeowners can create any railing design with FlexFX stainless steel fitting and cable to fit their style.

Installation on-site is easy with the exclusive Push-Lock® fittings, which do not require any special tools. Simply push the cable into the fitting and it locks. The cable can be cut and inserted into the hardware easily and fittings screw into the posts.

Ordering Made Simple

RailFX has a simple online quoting system with a step-by-step process. Now, faster lead times are possible with FlexFX, cable railing kits, and aluminum railing systems. Quotes are turned around in 48 hours, and products (stock colors) shipped within three to five days to any location in protective packaging. 


In today’s residential trends, homeowners want more accessible space in their homes and more connection to their natural surroundings. That’s why some DIY projects, like new deck builds, are so popular.

Using a cable railing system gives homeowners the safety they require without sacrificing their view. Although there are many options, some manufacturers provide entire assembly kits for installing cable railing, reducing effort and guesswork; saving both time and mistakes.

However, DIYers and professionals alike run into the problem of taking the cable railing around corners and on stairs. RailFX cable railing systems provide the components necessary to make these transitions easier to install, however questions might arise during your project.

What should I plan for during my cable railing installation? (or “Where should I start?”)

Start by plotting out the railing system, using a bird’s-eye view to draw out the project. You’ll want to plan out: 

  • All post locations
  • Railing lengths
  • Railing height
  • Post configuration (single or double) at corners
  • Locations of stairs and corners
  • Post height
  • Material (wood, steel, aluminum, composite sleeve)
  • Cable diameter (1/8” or 3/16”)
  • Composite sleeve diameter (if you’re using composite sleeve)
wood deck with cable railing

Are any special tools needed?

The RailFX system was designed to eliminate the need for any special tools for a smoother installation. That’s why you’ll notice features like the pre-drilled posts, making cable threading through posts a much easier step, especially since all cable railing fasteners are included in the kit.

You might also have the following basic tools at the ready:

  • Angle Finder
  • Cut Off Wheel
  • Cable Release Key
  • Cordless Impact Drill
  • 9/16 Socket with adapter
  • Ear Plugs
  • Fine File
  • Level
  • Masking Tape
  • Pen/Pencil
  • Power Miter Saw with 80 tooth carbide blade
  • Razor Knife
  • Roto Hammer with concrete drill bit
  • String / Laser
  • Tape Measurer
  • Vice Grips / Cable Gripping Pliers
  • #2 Phillips bit
  • #2 Square drive bit
cable railing on wood post

What’s the difference between installation on wood and metal posts?

For wood posts, you’ll need to keep the post from bending when the cables are tensioned, so a minimum 4×4 (3½”-square) post is required. The top rail should be reinforced with support, like a 2×4. Note the end posts should be checked and securely mounted to the deck before the cables are tensioned. A bottom rail can also help to distribute tensioning force away from the bottom of the post, but it isn’t required.

RailFX offers kits that are designed for aluminum posts with 1½ x 1½ inch square and 2 x 2 inch square tubing (note the posts are not included in the kit). End posts should be a minimum 1/4” thick wall to handle the load when the cables are tensioned; intermediates can be 1/8”. A top rail is essential for the system’s structural integrity. For aluminum, your end posts should be reinforced. And depending on your design aesthetic, you might want to consider a bottom rail for an added touch.

What should I know about the post configurations, especially at transitions like corners or stairs?

You’re provided with pre-drilled posts when you order the RailFX cable railing system. If you’re using existing posts, installers will need to drill holes as indicated by the installation instructions. The size of the holes will vary depending on the fitting or cable size. Another factor is if the fittings will terminate or if the cable will be threaded through the corner post for cable run continuation. For other posts in the system, the holes may only need to be one size. Unlike some competitors’ railing systems, which ask you to drill as many as 4 to 5 holes sizes in a particular post, RailFX drills the necessary hole in the post for you.  However, be sure to verify the number of different hole sizes needed for the kit you purchase.

When deciding the post configuration for corners, there are a couple options. Based on your design aesthetics and post material, you can choose to include either one or two posts in the corner. If you are using 4” x 4” wood posts, one post in the corner is sufficient. The RailFX aluminum system provides the option to utilize one or two posts in a corner.  

Cable transitions for stairs may seem complicated however RailFX  makes it easy by breaking it down step-by-step in their installation instructions. If the project calls for wood posts, it’s recommended to purchase the optional Post Protector Tubes. These will prevent the cable from slicing the wood when threading it through and exiting the post on an angle.

Railing inspiration

Is cable railing easy to maintain?

Your cable railing might accumulate pollen or some oxidation at the surface, and natural weathering is normal. The RailFX system is popular because it’s low maintenance, needing only an occasional cleaning with a simple soap and water solution.

Does the cable railing system come with a warranty?

The RailFX system, cable and fittings are all covered by a 10-year warranty.

How much can I expect to pay for the RailFX cable railing system?

Contractors, architects and DIYers alike appreciate the quick turn-around time on quotes the RailFX service team provides so you can plan your project’s budget easily. No one wants to wait weeks to hear back on a quote, RailFX customers can complete a quote for their project and expect to hear back within 48 hours.

Choosing the Best Cable Railing System for Your Design

By choosing a cable railing system from RailFX, installers are guaranteed a smoother project. And with a 2 week lead time from order to delivery, plus durable packaging for shipment, you can help to ensure your job gets done correctly and on schedule.

Have questions about your next installation? Contact us here.